Cisco ASA RADIUS Integration
Introduction
This document describes steps to configure a Cisco ASA with Swivel as the authentication server. Swivel can provide Two Factor authentication with SMS, Token, Android, iOS and strong Single Channel Authentication TURing, Pinpad or in the Taskbar Client using RADIUS. AnyConnect works with Swivel if started in the portal.
Swivel integration is made using RADIUS authentication protocol with an option to configure the login page. Depending on your needs, you can modify the default customization object or create a new customization object. There are many ways to configure it to work with Swivel such as:
- Username AD Password and Swivel Authentication (The most common method with AD authentication made against the LDAP server and OTC checked against Swivel using RADIUS)
- Username AD Password and Swivel Authentication (AD authentication and OTC checked against Swivel using RADIUS)
- Username and OTC (OTC checked against Swivel using RADIUS authentication)
And various other options including local password.
To use the Single Channel Image such as the TURing Image, the Swivel server must be made accessible. The client requests the images from the Swivel server, and is usually configured using a NAT (Network Address Translation), often with a proxy server. The Swivel virtual appliance or hardware appliance is configured with a proxy port to allow an additional layer of protection.
For the Cisco IPSEC client Swivel integration see Cisco IPSEC Client Integration
Configuration steps overview
- Configuring the Swivel server
- Create a customization object to hold the attached Javascript.
- Create an authentication server group with RADIUS protocol.
- Create a connection profile (tunnel group) to link login URL, authentication server and custom login page together.
Prerequisites
- Cisco ASA 8.03 or higher
- Cisco documentation
- AuthControl Sentry 3.x, 3.5 or higher for RADIUS groups
- NAT for Single channel access
Login Page customisation prerequisites
Download: Cisco ASA 8 Logon Page Customisation Script
Note
Beware if opening this in Wordpad or similar in case the text editor wraps the text onto a new line.
This script can be used for TURing, SMS, Token, Android or iOS . There is an alternative customisation
for Pinpad, available here.
For Single Channel TURing images some editing of the script is required.
Note
The AuthControl Sentry server must be accessible by client when using Single Channel Images, such as the Turing Image or Pinpad, and security string number. Typically this external access is usually facilitated by a Firewall NAT rule.
Baseline
- Cisco ASA version: 8.03, Also tested with 8.21
- AuthControl Sentry version: 3.5, 3.6, 3.7, 3.8, 3.9, 4.0, 4.1
Architecture
The Cisco ASA makes authentication requests against the Swivel server by RADIUS.
The client makes TURing requests against the Swivel server using HTTP/HTTPS.
AuthControl Sentry Configuration
Configuring the RADIUS server
On the AuthControl Sentry Administration console configure the RADIUS Server and NAS, see RADIUS.
Enabling Session creation with username
To allow the TURing image, Pinpad and other single channel images, under Server/Single Channel set Allow session request by username to Yes.
Setting up Swivel Dual Channel Transports
Used for SMS, see Transport Configuration.
Cisco ASA Configuration
Create a Radius Authentication Server Group
Authentication Server Group is used to hold necessary information about the Swivel server. Go to Remote Access VPN -> AAA/Local users -> AAA Server. Click on Add to add an AAA Server Group.
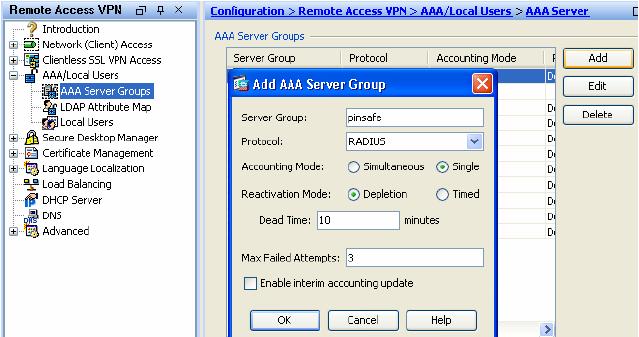
Enter a name for Server Group, select RADIUS for Protocol and click OK. With the newly created server group name selected, click on Add on the right bottom to add a Swivel server.

Enter Swivel server’s IP, authentication port and server secret key as indicated. Click on OK then Apply to save the AAA server group.
Optional: Create a Secondary Authentication Server
The login page can be configured to display Swivel as a primary or secondary authentication server. To use multiple authentication servers, they must be configured under Remote Access VPN -> AAA/Local users -> AAA Server. This example shows an AD Server being added.
Go to Remote Access VPN -> AAA/Local users -> AAA Server. Click on Add to add an AAA Server Group.
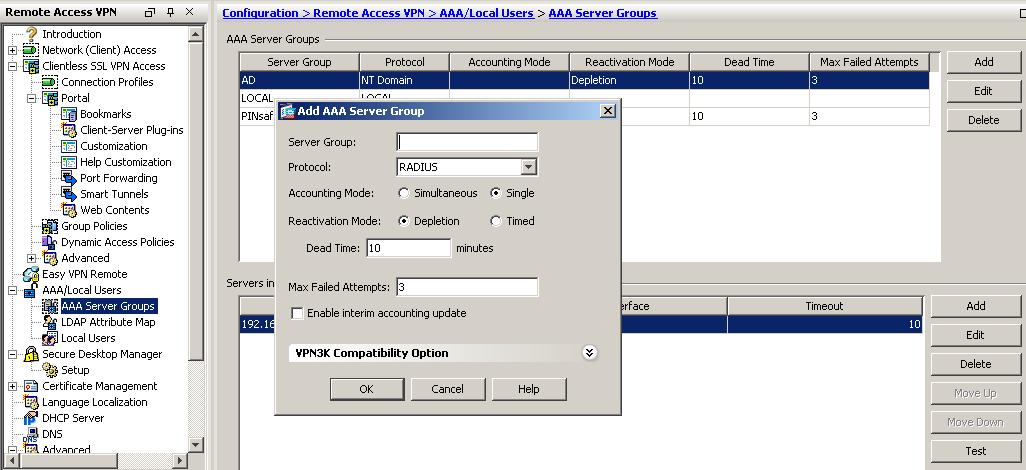
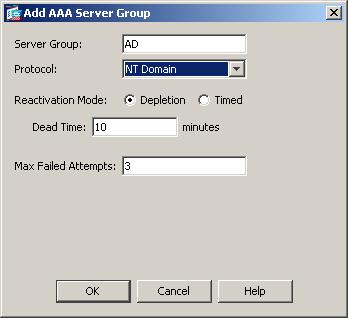
Enter a name for Server Group, select NT Domain or Kerberos for Protocol and click OK. With the newly created server group name selected, click on Add on the right bottom to add a NT Domain Server.
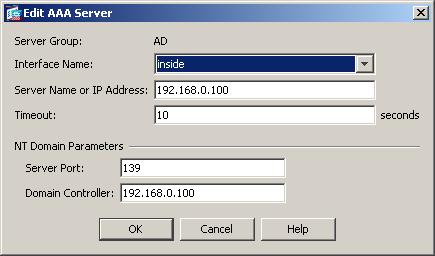
Enter the AD server’s IP, Server port and Domain Controller hostname. Click on OK then Apply to save the AAA server group.
This secondary authentication server then needs to be linked to the Connection Profile (see below).
Create a Connection Profile (Tunnel Group)
Swivel can be defined as a Primary Authentication server or as a Secondary authentication server.
Connection Profile is used to link authentication server group, URL used to access the ASA, and login page customization together. Go to Remote Access VPN -> Clientless SSL VPN Access -> Connection Profiles. Click on Add to add a connection profile.
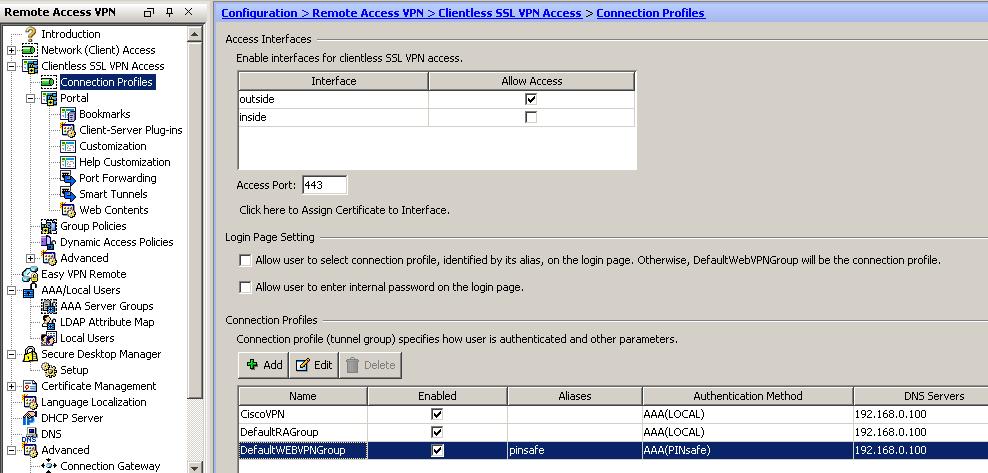
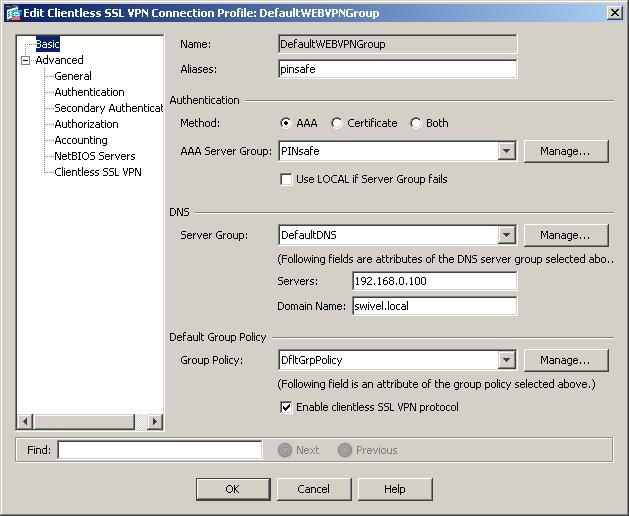
In Basic panel, enter a name, alias and select the AAA Server Group created. Swivel can be configured as the Primary authentication server or the secondary authentication server.
Click on Advanced then Clientless SSL VPN. Select the customization object created and add a Group URL used to access the ASA with Swivel authentication.
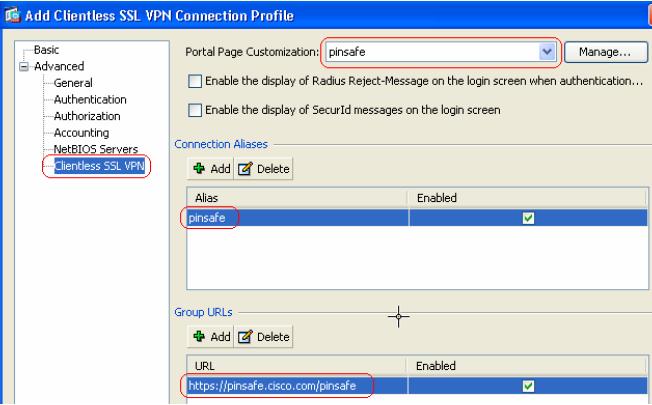
Click on OK then Apply to save the Connection Profile.
Optional: Create a Secondary Authentication for the Connection Profile (Tunnel Group)
This option has been configured using the Secondary Authentication server option available in ASA 8.21
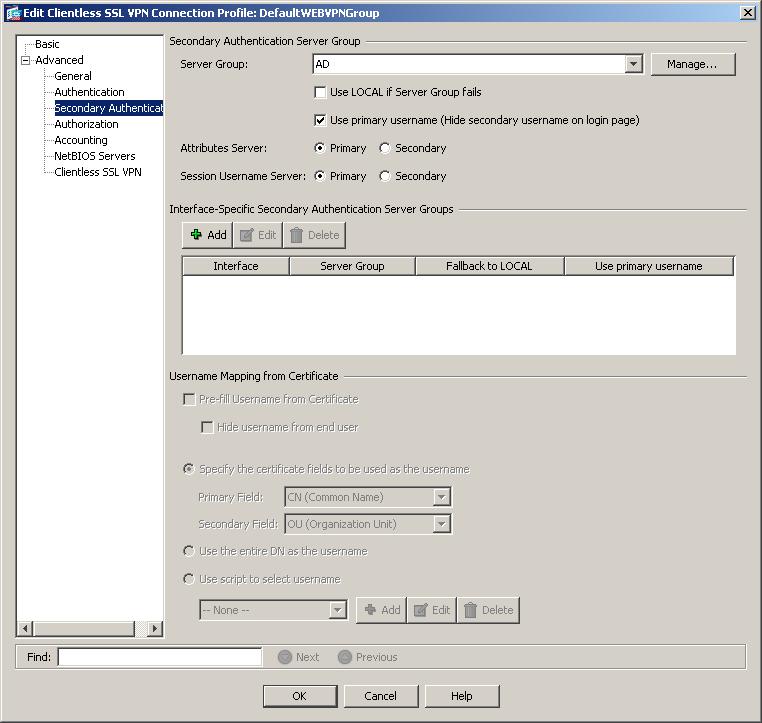
Go to Remote Access VPN -> Clientless SSL VPN Access -> Connection Profiles, select the connection profile created above then select Edit. Expand the Advanced option list and select Secondary Authentication. Enter the Secondary server group required and if the username should be reused.
Ensure the box “Use primary username (Hide secondary username on login page)” is ticked. Click on OK to save the settings. If AD is defined as the Primary authentication server then Swivel can be defined as the secondary AD server.
Test the RADIUS authentication
At this stage it should be possible to authenticate by SMS, hardware Token, Mobile Phone Client and Taskbar to verify that the RADIUS authentication is working for users. Browse to the SSL VPN login page, and enter Username and if being used, the password. From the Swivel Administration console select User Administration and the required user then View Strings, and select an appropriate authentication string or OTC for the user. At the SSL VPN login enter the required OTC. Check the Swivel logs for a RADIUS success or rejected message. If no RADIUS message is seen, check that the Swivel RADIUS server is started and that the correct ports are being used.
Optional: Login Page Customisation
If the Swivel Single Channel Image is to be used, then the login page needs to be customised. If single channel authentication is not required, or other page modifications such as for SMS on Demand buttons, then this section can be skipped. The login page customization is used to insert necessary Javascript to retrieve Swivel Turing image. In ASDM, go to Remote Access VPN ->Clientless SSL VPN Access -> Portal -> Customization. Click on Add to add a new customization object.
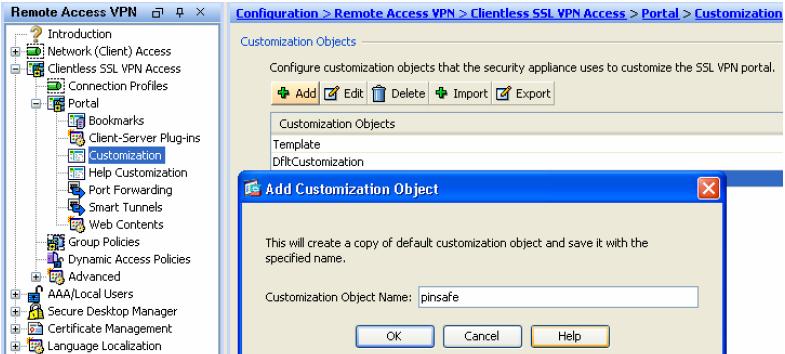
Enter a name for the object, click on OK then Apply.

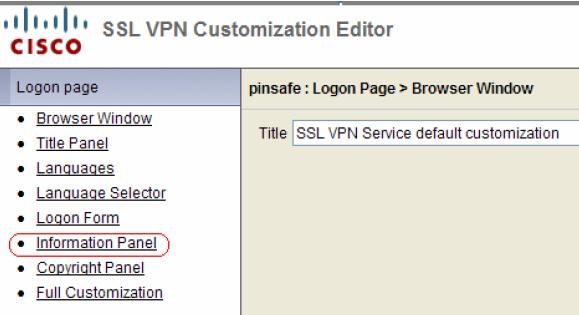
With the new object selected, click on Edit to enter the Customization Editor. Click on the Information Panel menu item. Note: If the information panel has been moved to a different location then the script can be added to the Copyright panel instead.
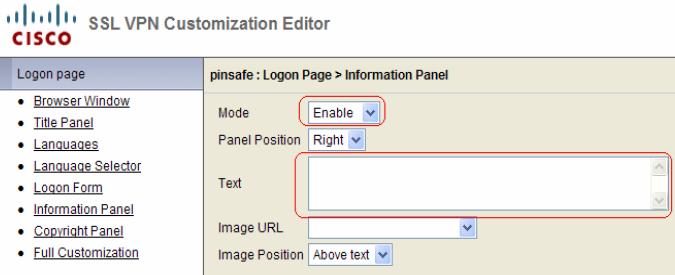
Change Mode to “Enable”. Modify the pinsafeurl variable in the Cisco ASA 8 customisation Script to reflect your Swivel server’s URL. (The scripts are located at the top of the page under prerequisites). Paste the modified content into the Text box. Click on Save on the top right corner of the Customization Editor to save the object.
WARNING: the Panel Position must be set to Right for the script to work. This is so that the customisation script is rendered after the logon form. If you particularly need the information panel to be on the left, put the Swivel customisation script in the Copyright Panel instead, as that is always rendered at the bottom.
The following elements need to be modified in the script:
//Modify the value of primary to reflect the URL of your PINsafe server
//if using on-demand SMS, url will need to be DCMessage rather the SCImage
//if using an HA pair and you wish the page to try one server then the other to receive a TURING
//set standby to be the url of the standby swivel virtual or hardware appliance and set ha to true;


var primary='https://demo.swivelsecure.com:8443/proxy/SCImage?username=';
var standby='https://demo.swivelsecure.com:8443/proxy/SCImage?username=';
var pinsafeurl = primary;
var ha = false ; //set HA to true if you want the page to try two servers
var loadTimeout = 2500;  //how long the page waits (in milliseconds) for the image to be served from the main server before trying the secondary
var secondaryAuth = true; // set to true if you want Swivel to be the secondary authentication option
var button = true; //set to true if you want to show a button that requests a security string
var autoShow = true; // set to true to show the TURing image automatically after entering the username
Note that for the Pinpad version, SCImage will be replaced with SCPinPad.
The primary and standby should be modified. If a standby is not used then set var secondaryAuth = false
For a virtual or hardware appliance:
var primary='https://demo.swivelsecure.com:8443/proxy/SCImage?username=';
To use multiple security strings in an SMS message, this can be modified to show the next security string which should be entered.
For a virtual or hardware appliance:
var pinsafeurl='https://demo.swivelsecure.com:8443/proxy/DCIndexImage?username=';
The text can also be changed to reflect the request for a security string index number. See also Multiple Security Strings How To Guide
"Please enter your user name and click on Get OTP Index";
The Button to request the Security String Index can also be edited:
obj[0].value="Get OTP Index";
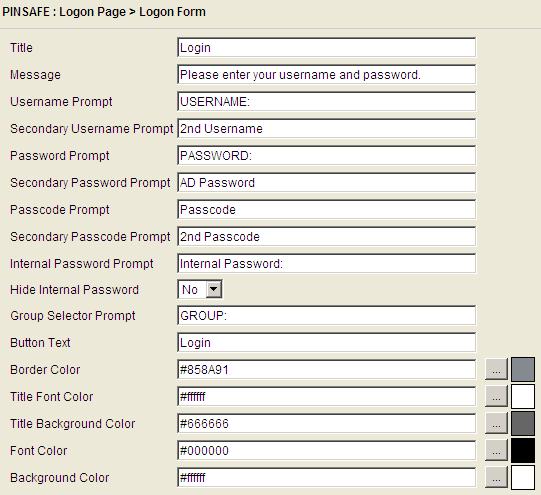
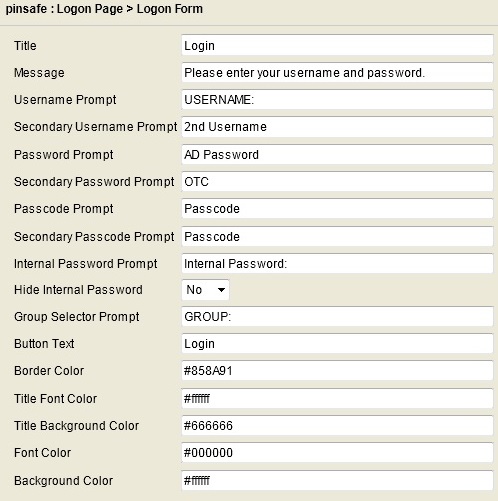
The Logon Form can be edited to suit the language and secondary authentication password message. Select the Logon Form to display the fields available.
AuthControl Sentry as the primary authentication server, AD as the secondary authentication server.
AD as the primary authentication server, AuthControl Sentry as the secondary authentication server.
Testing
Now the configuration is complete. You can use the configured Group URL to access the ASA with AuthControl Sentry authentication.
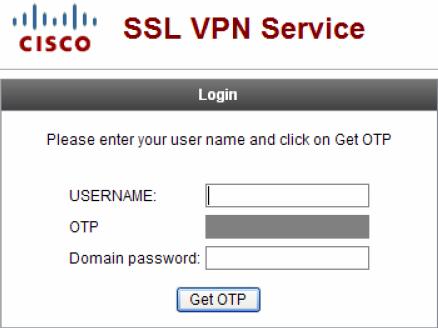
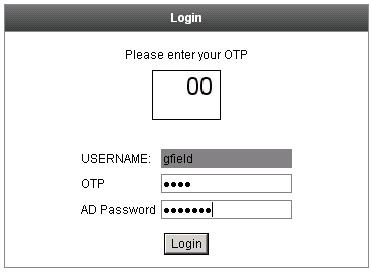
If configured, a Domain Password prompt will appear.
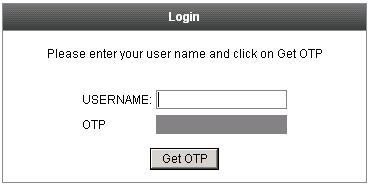
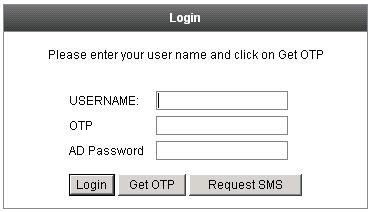
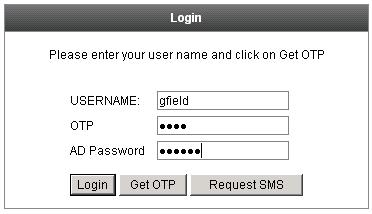
Before the user name is entered, the OTP (One Time Password) field is grayed out. Enter a user name and click on Get OTP.
OTP login with Domain Password
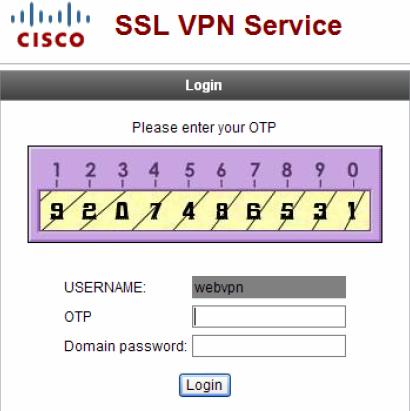
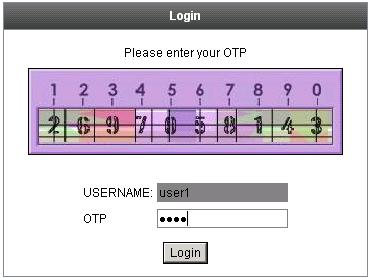
Use your PIN to extract the OTP and enter it in the OTP field. If everything is configured correctly, you will see the portal page after clicking on Login. Please note that the Javascript to retrieve the Turing image is executed at the user’s browser. Therefore, the user’s PC must have access to the AuthControl Sentry URL. It is highly recommended that you configure your AuthControl Sentry server to use SSL/https to protect the session. Also if you are using a AuthControl Sentry virtual or hardware appliance, the image can be requested via the built-in image proxy.
The below screen shot shows the use of the Security String Index to tell the user which of their multiple security Strings to use.
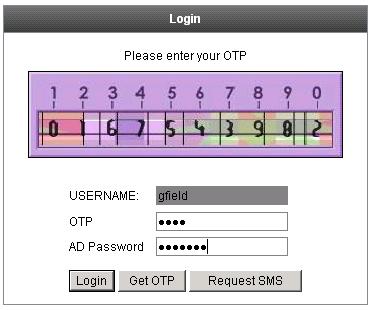
The below security screen shows a login screen with Turing and SMS on Demand login options.
Additional Configuration Options
The Cisco server can be configured to use multiple authentication servers such as Active Directory.
Two Stage and Challenge/Response authentication can also be configured.
The integration uses Swivel as the primary authentication server and AD as the secondary authentication server. It would be possible to change this order.
If you need to reference the secondary password label or field, the IDs are “secondary_password_field” and “secondary_password_input” respectively.
For example, if you want to change the secondary password prompt from within the customised script, use the following:
obj=document.getElementById("secondary_password_field");
if(obj) {
obj.innerHTML="AD password";
}
Customisation for One Touch / Push
This section describes how to customise the Cisco ASA login page to support Push authentication (previously One Touch). In order to use One Touch with Cisco ASA, you must have the AuthControl Sentry software version 3.11.5 or later.
Before applying this customisation, read the article on One Touch to ensure that the AuthControl Sentry Appliance is prepared.
Follow the instructions on customisation above up to the point where the information panel is enabled. Now insert the following in the information panel:
 <script src="https://ajax.googleapis.com/ajax/libs/jquery/2.1.3/jquery.min.js"></script>

 <script>
function redirect(){
 window.location.replace("https://<swivel_server>:8443/onetouch/onetouch?returnUrl="
 + encodeURIComponent(window.location.href) );
}

var QueryString = function () {
  // This function is anonymous, is executed immediately and
  // the return value is assigned to QueryString!
  var query_string = {};
  var query = window.location.search.substring(1);
  var vars = query.split("&");
  for (var i=0;i<vars.length;i++) {
    var pair = vars[i].split("=");
    // If first entry with this name
    if (typeof query_string[pair[0]] === "undefined") {
      query_string[pair[0]] = pair[1];
    // If second entry with this name
    } else if (typeof query_string[pair[0]] === "string") {
      var arr = [ query_string[pair[0]], pair[1] ];
      query_string[pair[0]] = arr;
    // If third or later entry with this name
    } else {
      query_string[pair[0]].push(pair[1]);
    }
  }
  return query_string;
} ();

$(document).ready(function(){
  usernamePassedIn = QueryString["username"];
  passwordPassedIn = QueryString["password"];
  claimPassedIn = QueryString["claim"];
  if(typeof claimPassedIn == 'undefined') {
    redirect();
  } else {
    $('[name=password]').val(claimPassedIn);
    $('[name=username]').val(usernamePassedIn);
    document.getElementById("unicorn_form").submit();
  }
});

</script>
Troubleshooting
Check the AuthControl Sentry logs for Turing images and RADIUS requests.
Image from PINsafe server absent
Login page modifications absent
This can be caused if the script has been altered with line feeds inserted in a text editor from wrap around text. View the login page source and see if it contains the page modifications, and are not being displayed correctly.
TURing image doesn’t change
If you are repeatedly shown the same TURing image for multiple logins, or after refreshing the page, this may be due to page caching settings in your browser. To avoid this problem, change one line in the customisation. Search for the string:
obj.innerHTML += '<br><br><img border="1" src="'+pinsafeurl+uname.value+'">';
and replace it with the following:
obj.innerHTML += '<br><br><img border="1" src="'+pinsafeurl+uname.value+'&random='+Math.floor(Math.random()*10000)+'">';
This results in a different URL every time the TURing image is displayed, thereby avoid problems with caching.
Known Issues and Limitations
None
Additional Information
We have a customised AnyConnect VPN client available for testing. Please see here for more details.
For assistance in Swivel installation and configuration please firstly contact your reseller and then email Swivel Secure support at support@swivelsecure.com