Salesforce SAML Integration
Create SAML Keys on CMI
Keys are used within SAML to create a trust relationship between Sentry (acting as an IDP) and a SAML-compliant service provider. It is important that you create your own keys for this integration and keep the private key secure.
Generating Keys
From the CMI Main Menu select the Appliance Option, then select Sentry Menu option.
You will see the keys that are currently being used by Sentry (if any).
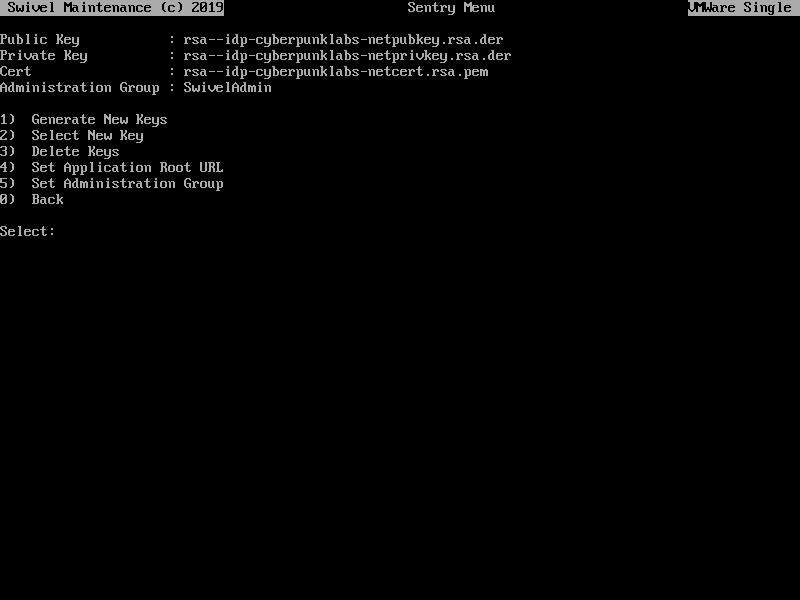
Select Option 1 to Generate New Keys
Give the key a name eg SentryProductionKey Select the key type, RSA or DSA (RSA is recommended for wider compatibility).
Some integrations require keys of a specific type so refer to the appropriate integration guides.
You then need to enter the information required to generate the key. These parameters are:
Country Name e.g. US. This should be the standard 2-letter ISO country code.
State or Province e.g. Washington.
Locality: e.g. Seattle.
Organisation: Your Company or Organisation Name.
Organisation Unit: Relevant unit, e.g. Information Technology.
Common Name: The full server hostname, e.g. sentry.domain.com.
Email Address: contact email address for the certificate.
Once you have entered all the details the new keys and certificate will be created.
You will be asked if you want to start using the new key immediately. If you say NO you can select the key at a later date.
Warning
Changing the key being used will impact any existing SAML-based integrations. The existing service providers will need to be updated with the new keys.
Selecting a Key
Select the Select New Key option will list all the keys that have been created on the appliance. You can select the key you wish to use.
Note
You need to restart tomcat for the changes to take effect.
Enable SAML on Salesforce
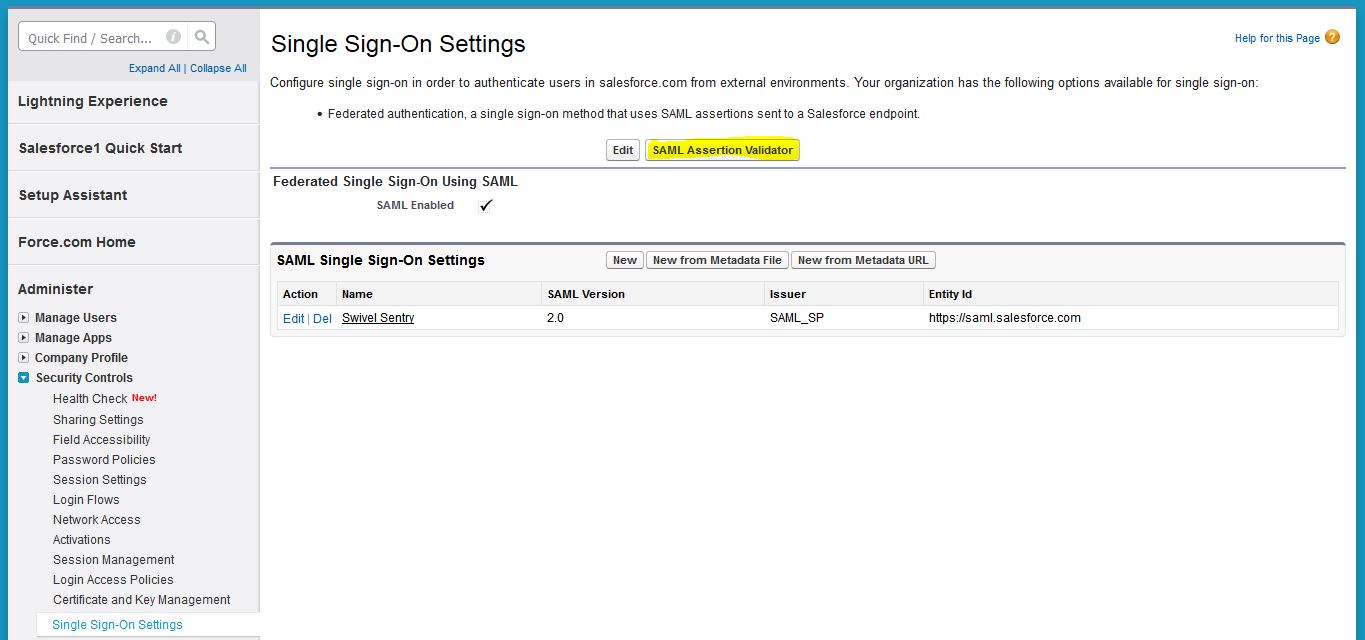
Enable SAML. A checkbox option entitled “SAML Enabled” should be available in Salesforce under the menu Setup -> Security Controls -> Single Sign-On Settings.

If this option is not available, then you will need to request this feature from Salesforce support or your Salesforce reseller partner.
Create a new Single Sign-On Settings entry on Salesforce
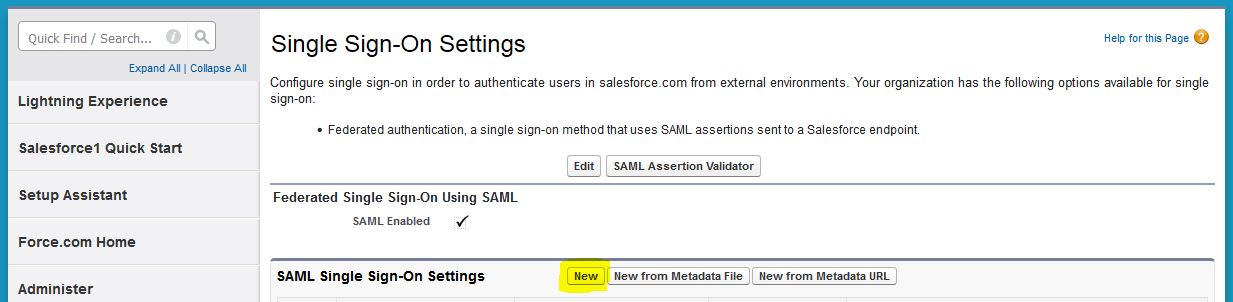
Under the menu Setup -> Security Controls -> Single Sign-On Settings, create a new SAML Single Sign-On Settings entry by clicking the New button.
Populate all required fields and “upload the certificate you generated earlier” (this can be retrieved from the View Keys menu option of Swivel Sentry):
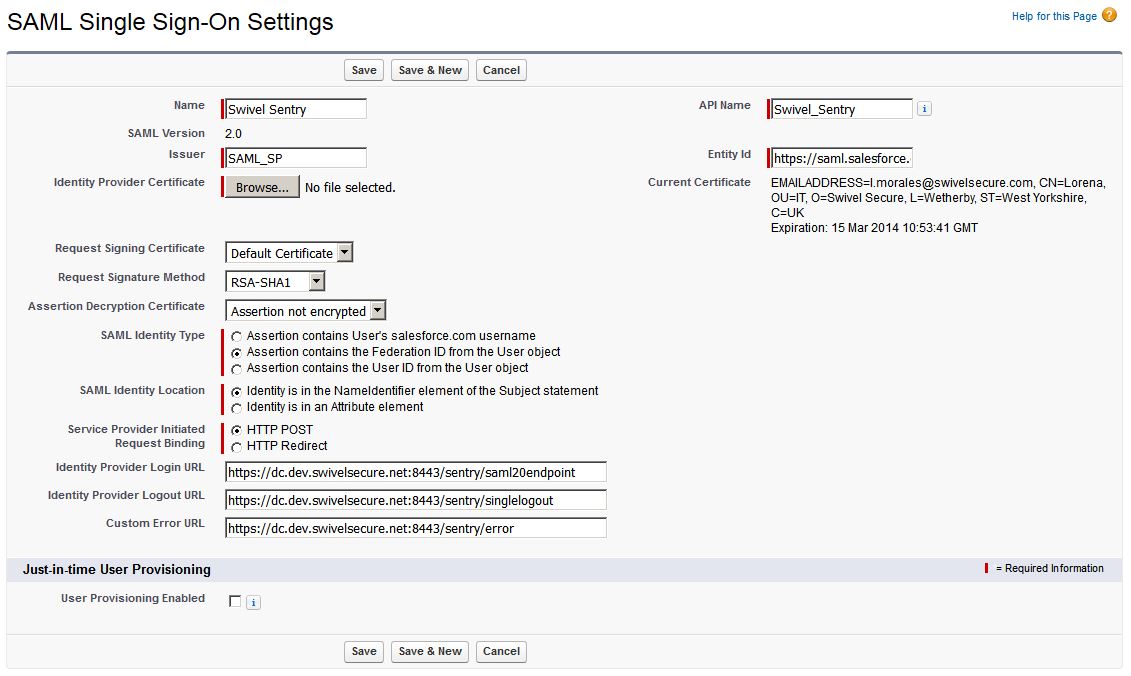
“Name” = “Swivel Sentry” (arbitrary value)
“Issuer” = Sentry endpoint URL https://yourdomain/sentry/saml20endpoint
“Identity Provider Certificate” = Browse to the RSA PEM file created earlier to upload the certificate. When you click save, if successfully imported, the details of the certificate will appear on the right hand side under the “Current Certificate” field.
“Request Signing Certificate” = Default Certificate
“Request Signature Method” = RSA-SHA1
“Assertion Decryption Certificate” = Assertion not encrypted
“SAML Identity Type” = Assertion contains the Federation ID from the User object
“SAML Identity Location” = Identity is in the NameIdentifier element of the Subject statement
“Service Provider Initiated” = “HTTP POST”
Set the Login, Logout and Error URLs below, where “<FQDN_OF_SENTRY_SERVER>” is the public DNS entry of your Swivel Sentry server, e.g. swivel.mycompany.com or if you do not have a redirect from port 443 to 8443 in place, you may need to include a port number e.g. swivel.mycompany.com:8443
“Identity Provider Login URL” = https://<FQDN_OF_SENTRY_SERVER>/sentry/saml20endpoint
“Identity Provider Logout URL” = https://<FQDN_OF_SENTRY_SERVER>/sentry/singlelogout
“Custom Error URL” = https://<FQDN_OF_SENTRY_SERVER>/sentry/error (ensure that the firewall 443 to 8443 port redirect and open port is in place for these URLs)
“API Name” = “Swivel_Sentry”
“Entity ID” = https://saml.salesforce.com
Username attribute configuration
Prior to configuration, you will need to determine which username attribute will be used for authentication and single sign on. For example you may wish to use the email attribute, or the sAMAccountName (default Active Directory username) or something else like an employee or security ID.
Username attribute examples:
Email attribute: email e.g. j.smith@mycompany.net
AD username: sAMAccountName e.g. jsmith
When a user attempts to authenticate to the Salesforce Application or any other configured application, they will need to enter this username in the Login page presented by the Swivel Sentry.
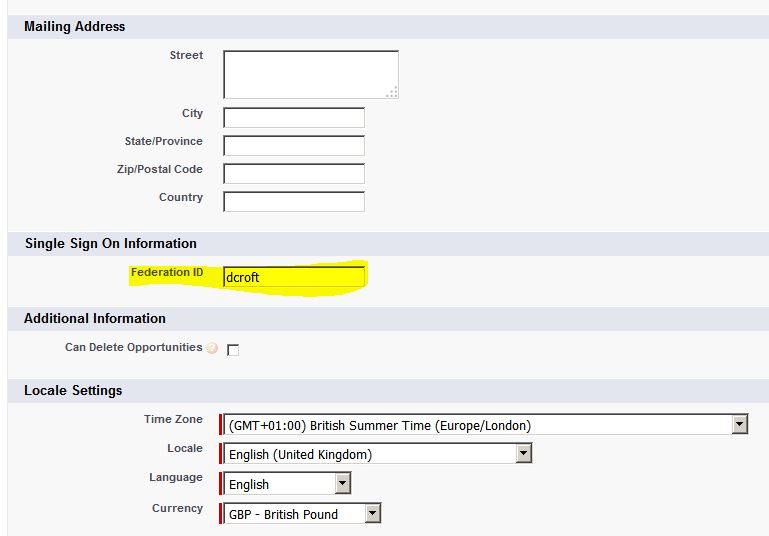
Configuring the federated ID in Salesforce
Against the User’s profile there is an area when you can configure the user’s federated ID. This could be their email address or Active Directory username for example.
Configuring alternative username attributes in the Swivel Core
If you have already imported the users into the Swivel Core with a particular username attribute, but wish to use another attribute for SSO and authentication, then you will need to configure an alternative attribute or delete and import the users into the Swivel Core again with the correct attribute.
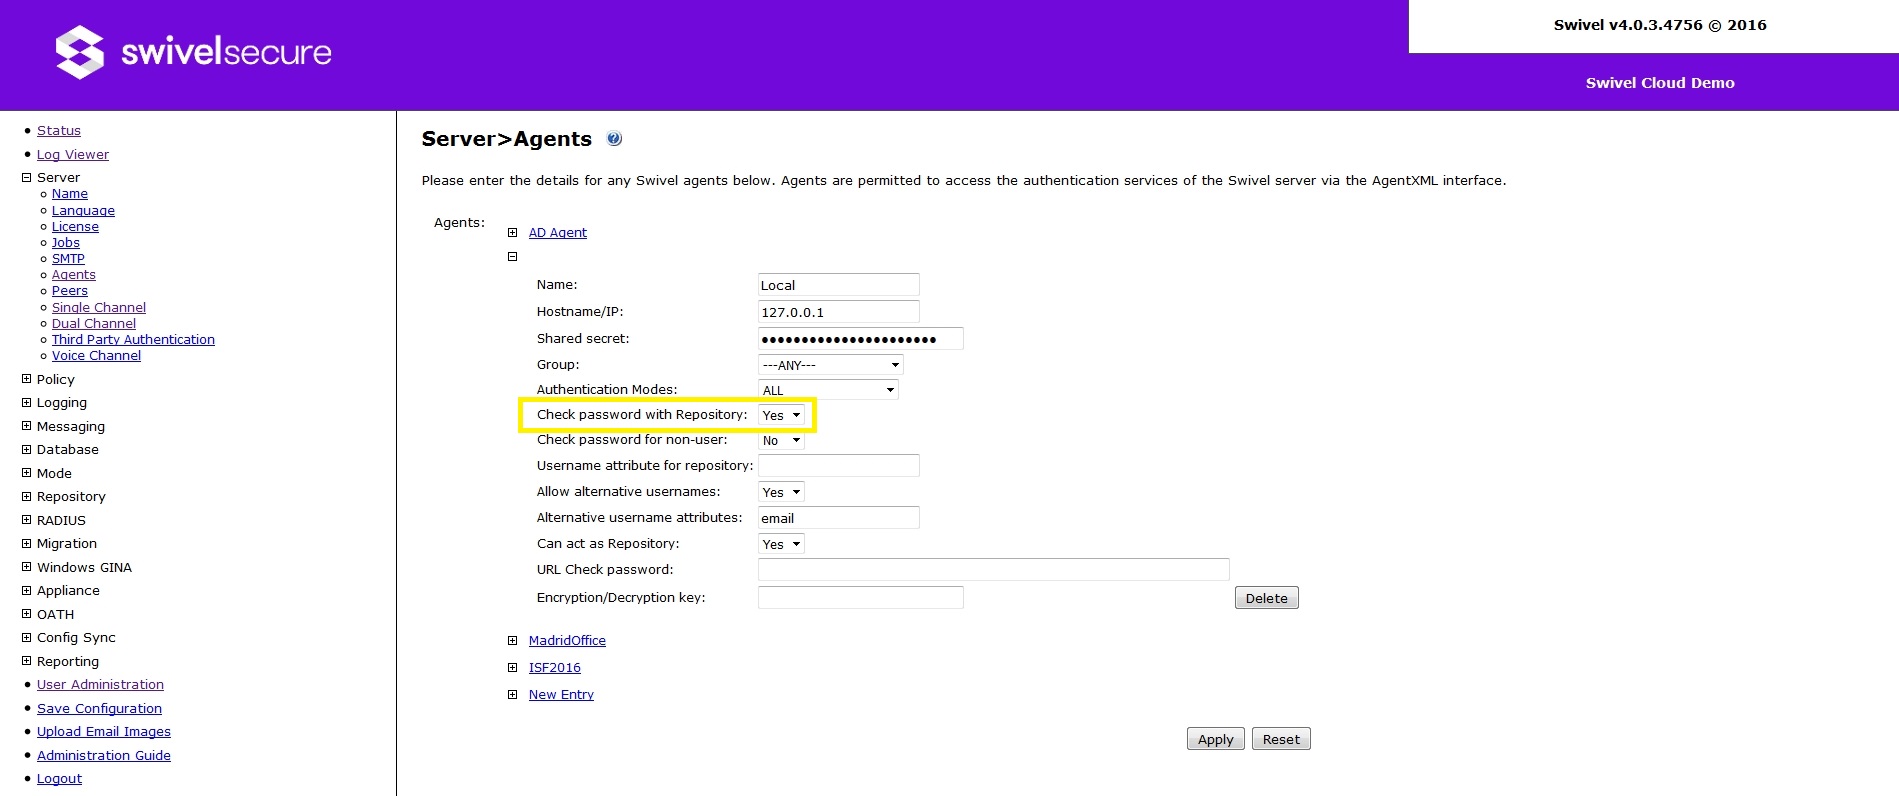
The Swivel Core allows the use of any attribute for the username provided that it is imported into the Swivel Core database during User Sync. The use of alternative attributes can be configured upon the Server -> Agent definition in the Swivel Core.
Below you can see an example of email attribute.
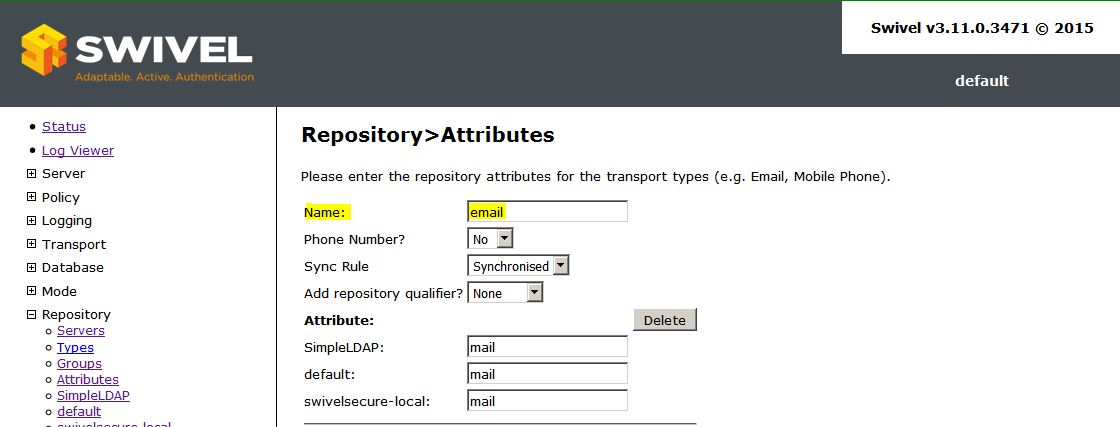
As another example, here is another attribute you might consider, on the Repository -> Attributes screen (altusername) which maps to the userPrincipalName on the Active Directory repository:
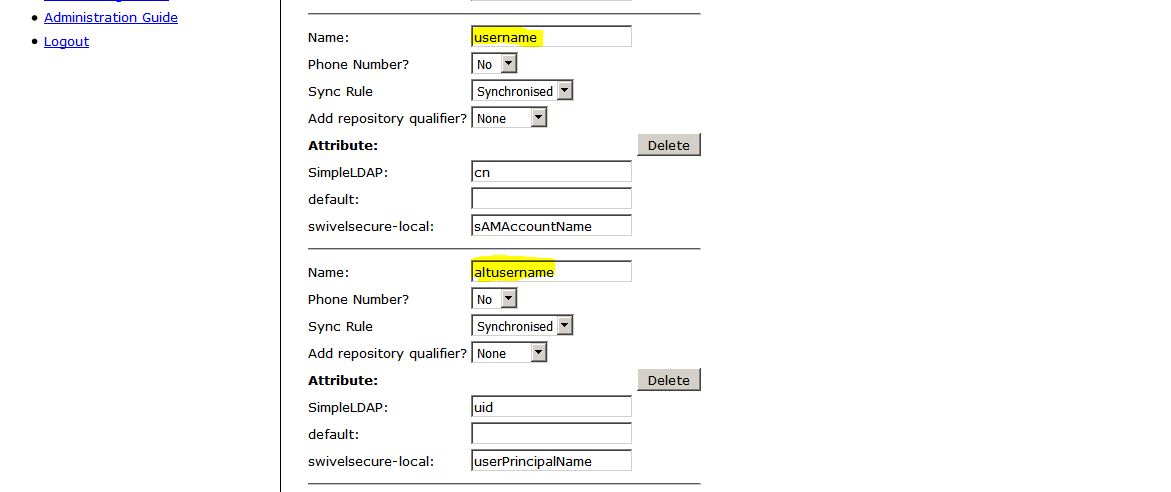
Again you need to be careful to enter the ‘Name’ such as username or altusername (highlighted) and not one of the repository mappings such as sAMAccountName or userPrincipalName.
Configure Check Password with Repository on the Swivel Core
In order to check the user’s Active Directory password, ensure that the “local” Agent defined under Server -> Agents has got the Check Password with repository checkbox enabled. When an authentication occurs in AuthControl Sentry, the Active Directory password will then be passed to Active Directory for verification.
Hint
If you just want to test Swivel Core authentication without checking Active Directory passwords, you can leave this setting off for the time being. When prompted for a password during login on the AuthControl Sentry Login screen, simply leave the password field blank.
Setup Sentry Application definition
Please note: you must have setup a Salesforce domain prior to defining this Application entry within Swivel Sentry. This is so that you are able to populate the Endpoint URL field.
Login to the Swivel Sentry Administration Console. Click Applications in the left hand menu. To add a new Application definition for Salesforce, click the Add Provider button.
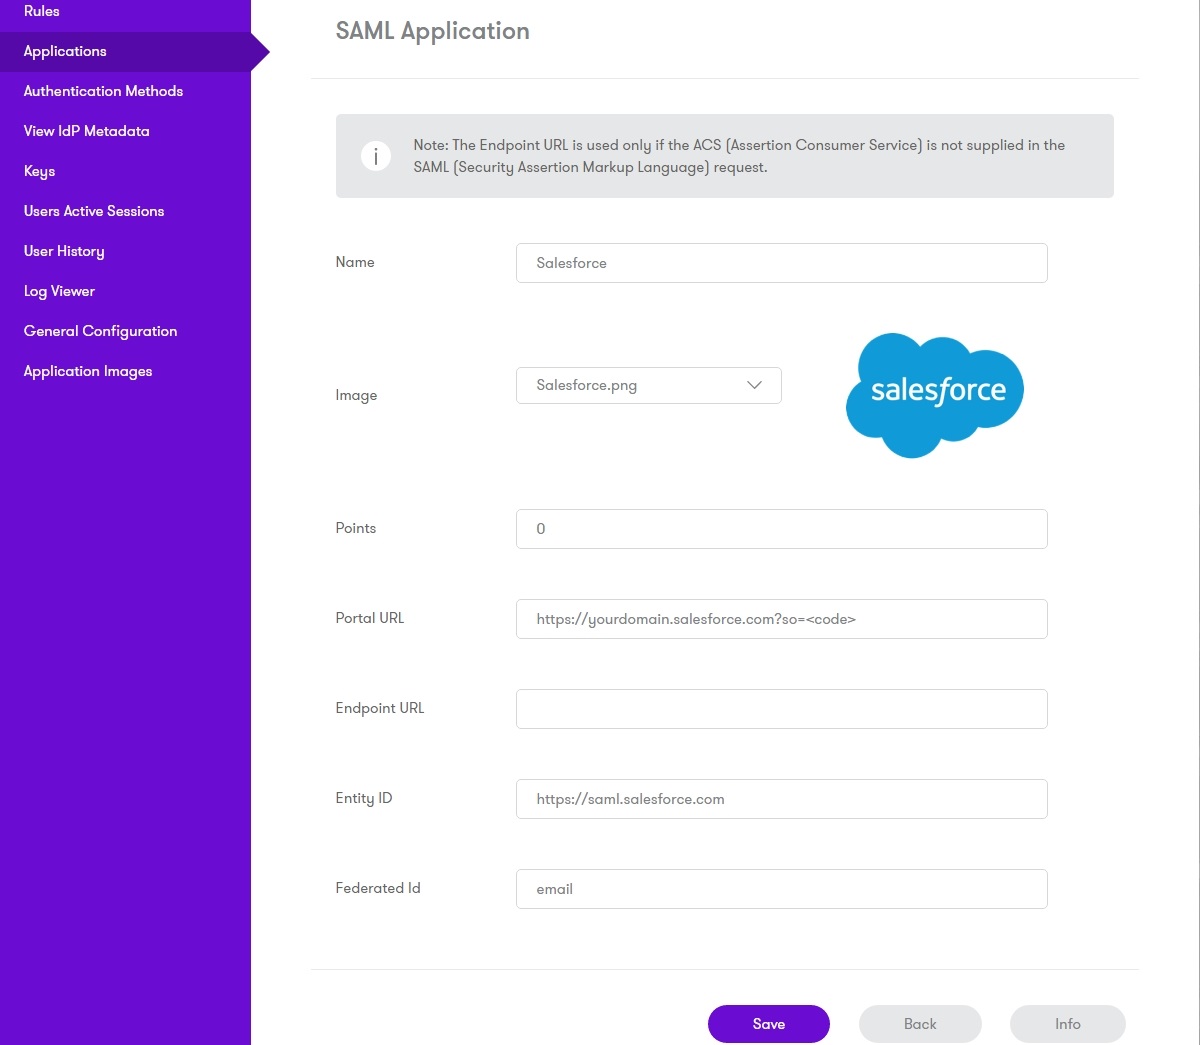
“Name”: Salesforce (Type an Arbitrary name for this Application)
“Image”: Salesforce.png (selected by default)
“Points”: 100 (the number of points the user needs to score from their Authentication Method in order to successfully authenticate to this Application)
“Portal URL”: (this Endpoint URL can be found on the Setup -> Security Controls -> Single Sign-On Settings page in Salesforce.com, listed as ‘Salesforce Login URL’ under the Endpoints section. It is unique to your Salesforce.com instance and domain. Example: <nowiki>https://companyname.my.salesforce.com?so=00E32000000cx7O</nowiki>. This requires that you have previously setup a Salesforce domain under Setup -> Domain Management -> Domains and that it is at least listed as ‘Domain Ready for Testing’ status on Salesforce.com)
“EndPoint URL”: N/A
“Entity ID”: <nowiki>https://saml.salesforce.com</nowiki> (at the time of writing this documentation, this settings is always the same when using Salesforce, but may be subject to change by Salesforce.com, so please review the online Salesforce documentation if you find that this Entity ID no longer works)
“Federated id”: email (That needs to match with the attributed defined on Salesforce.com and Swivel Core)
Setup Sentry Authentication definition
As an example here we will be using Turing authentication as the Primary method required for Salesforce authentication.
Login to the Swivel Sentry Administration Console. Click Authentication Methods in the left hand menu. Click the Edit button against the Turing option in the list of Authentication Methods. Give this Authentication Method 100 points. This will mean that when a login attempt is made to the Salesforce Application, this Authentication Method will be offered during login.
Assign the Salesforce domain to the SSO definition
On Salesforce, select Domain Management -> My Domains. Under the “Authentication Configuration” section, click Edit.
Deselect the “Login Page” checkbox and enable the checkbox of the authentication service that you created on the SAML SSO Settings screen. Click the Save button.
Testing authentication to Salesforce via Swivel Sentry
This should be the final step after all previous elements have been configured.
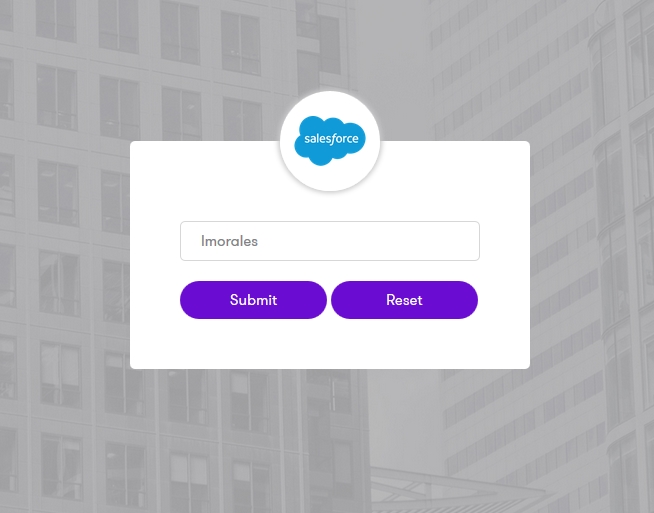
In a web browser, visit the Domain URL that you setup in Salesforce.com which also constitutes the FQDN part of your Endpoint URL e.g. https://companyname.my.salesforce.com
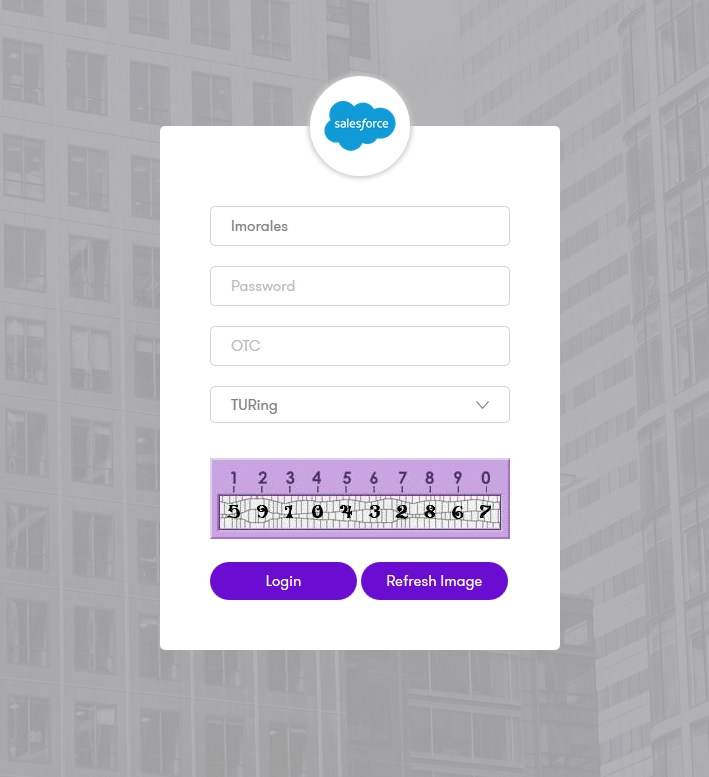
When you visit this URL you will notice that the domain should redirect to the identity provider login URL that you setup, once you have submitted your username. You should be presented with the page of the Authentication Method which can score enough points to match the points required by the Salesforce Application definition.
In this login example we are using the username attribute as the federated ID.
Troubleshooting
There are various logging components available for this particular integration which can aid in diagnosis at different points during authentication.
The Swivel Core has a Log Viewer menu item which can reveal information concerning user status e.g. is the user locked, has a session been started for the image request;
The Swivel Sentry has a View Log menu item which provides details about the SAML assertion and response received from Salesforce and can be useful for comparison with the Salesforce SAML Assertion Validator output;
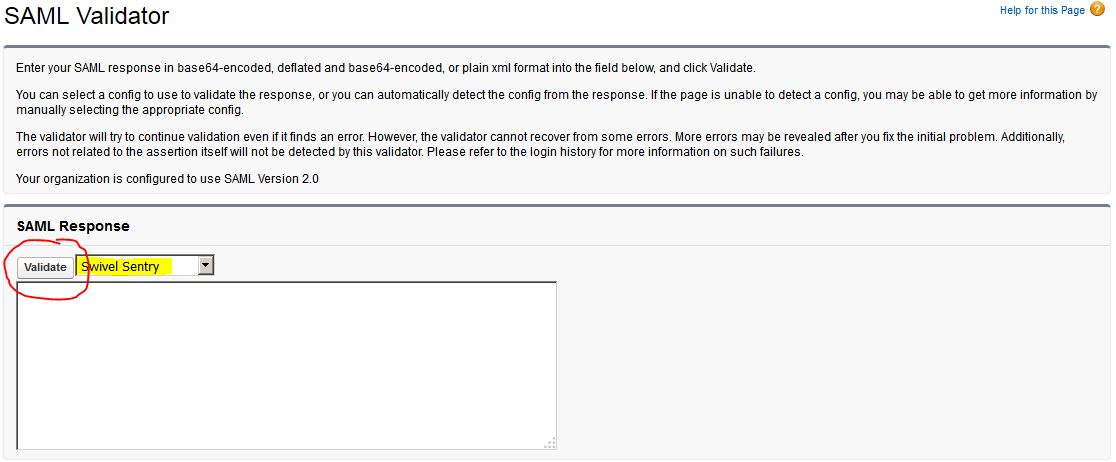
Salesforce has a SAML Assertion Validator which can provide diagnostics about the latest SAML authentication attempt. This can be particularly useful for verifying the federated ID and various elements within the SAML assertion that takes place between the Swivel Sentry and Salesforce.com. To get to the SAML Assertion Validator in Salesforce.com select Setup -> Security Controls -> Single Sign-On Settings. At the top of the page you will see the SAML Assertion Validator button:
Click the button and you will be taken to a screen when you select the name of your Single Sign-On Setting and click Validate:
Once you have clicked the validate button, the Results screen will appear and show some diagnostics.
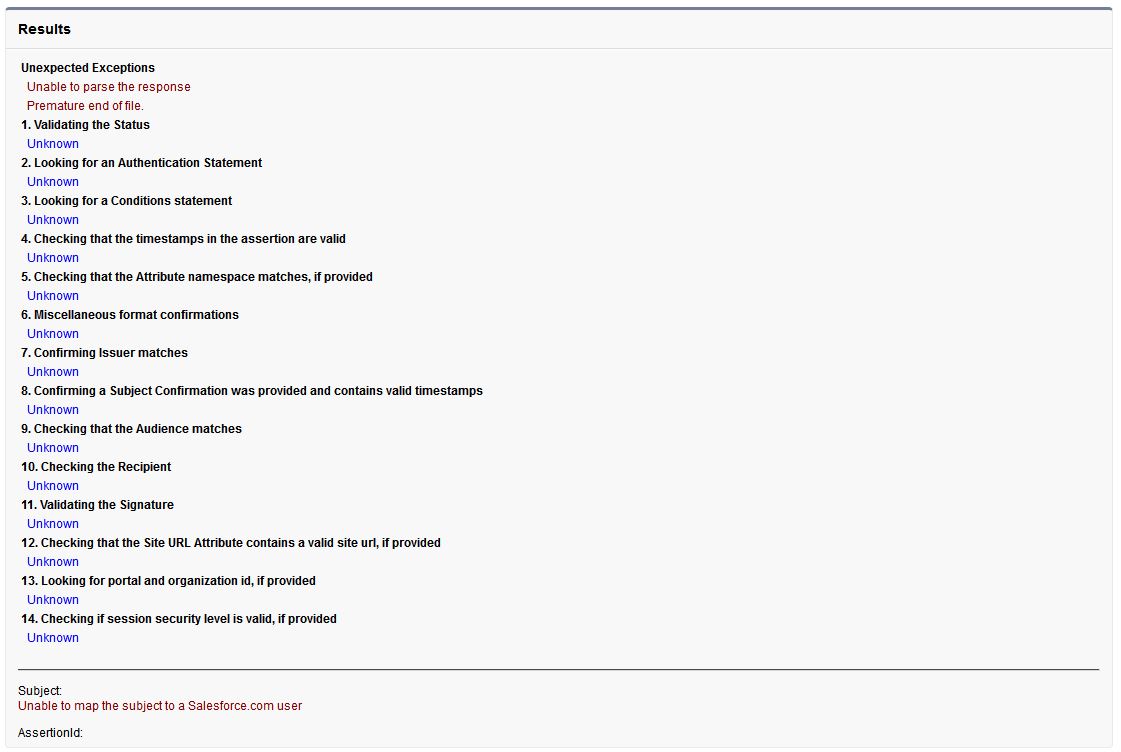
It is crucial when troubleshooting, to pinpoint where the authentication is failing. For example, you may find that the Swivel Core logs show a successful authentication (which would indicate that the user has entered their Password and OTC correctly), but the Sentry logging or Salesforce.com validator shows that there is a problem with the SAML assertion.
Two common issues which can be diagnosed with the validator are:
Certificate or decryption issues;
Can Sentry find the Certificate locally, is it the correct one?
Has the correct Certificate been uploaded to Salesforce.com?
Federated ID mismatch.
Has the Federated ID value been added to the user’s Salesforce.com profile?
Has Tomcat been restarted after populating the Sentry settings.properties file with the federated ID username attribute?
Does the Repository -> Attribute name being used actually map to a Repository attribute? Has a User Sync occurred in the Swivel Core since modifying this?