AuthControl Sentry SSO
What is Adaptive Authentication?
Swivel Secure’s AuthControl Sentry manages how users access a range of on-premises and cloud applications, integrating seamlessly with service providers using the SAML 2.0 protocol. It specifically controls if and how a user must authenticate to gain access to specific services. This functionality is referred to as Adaptive Authentication, allowing administrators to define authentication requirements based on the specific application being protected and the context of the access request.
Sentry applies a set of rules to determine which authentication method a user must complete before accessing a specific service. It achieves this by comparing two values:
Trust Score: The score a user achieves based on the context of their request (e.g., IP address, time of day, group membership).
Required Trust Score: The minimum score required by the application the user is attempting to access.
If the user’s current Trust Score is lower than the Required Trust Score, Sentry offers the user a choice of authentication options (such as Mobile App push or SMS) that will increase their score to the required level.
Note
In this documentation, the authentication platform web administration console (typically on port 8080) is referred to as the Core.
Definitions
- Application
A generic name for a remote access, cloud, or web application. Examples include Salesforce.com, OWA, or SSL VPN.
- Trust Score
An overall assessment of the confidence level regarding the validity of a specific access request.
- Required Trust Score
The threshold score a user must demonstrate to be granted access to a specific application.
- Rule
An element of logic used to calculate the Trust Score associated with a specific authentication request (e.g., checking if the IP is whitelisted).
- Authentication Method
One of several ways a user can authenticate (e.g., PINpad, Mobile Push, Hardware Token) to accrue points.
Getting Started
Create SAML Keys on CMI
Keys are used within SAML to establish a trust relationship between Sentry (acting as an Identity Provider/IdP) and a SAML-compliant Service Provider (SP). It is vital to create unique keys for your integration and keep the private key secure.
Generating Keys
From the CMI Main Menu, select the Appliance option.
Select the Sentry menu option.
You will see the keys currently used by Sentry (if any).
Select Option 1 to Generate New Keys.
Enter a name for the key (e.g.,
SentryProductionKey).Select the key type: RSA or DSA. RSA is recommended for wider compatibility.
Note
Some integrations require specific key types. Please refer to the specific integration guide for your target application.
Enter the required certificate parameters: * Country Name: Standard 2-letter ISO country code (e.g., US, GB). * State or Province: e.g., Washington. * Locality: e.g., Seattle. * Organisation: Your Company Name. * Organisation Unit: Relevant unit (e.g., IT). * Common Name: The full server hostname (e.g., sentry.domain.com). * Email Address: Contact email for the certificate.
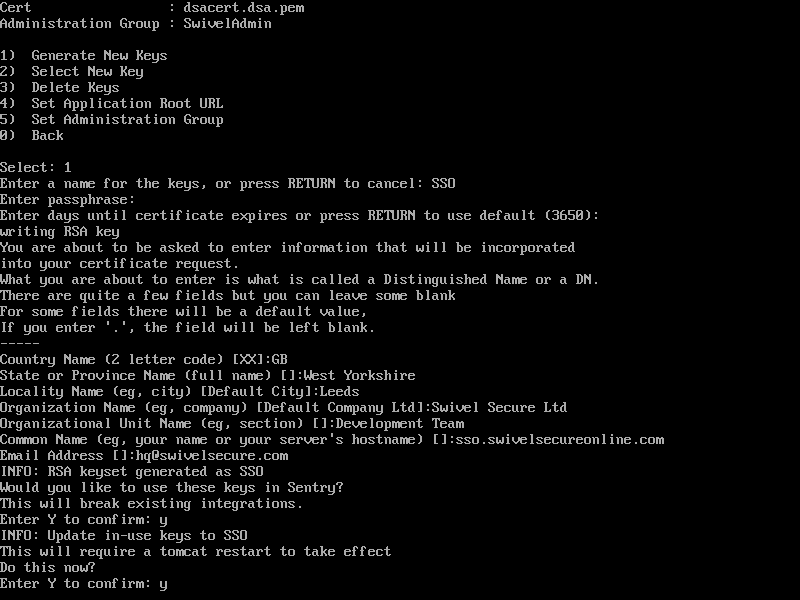
Once created, you will be asked if you want to start using the new key immediately.
Warning
Changing the active key will impact existing SAML-based integrations. Existing Service Providers must be updated with the new certificate immediately after this change.
Selecting a Key
The Select New Key option lists all keys created on the appliance. You can switch the active key here.
Note
You must restart Tomcat for key changes to take effect.
Login to Sentry
Access the Sentry console via the URL:
https://<SWIVEL_HOSTNAME>/sentry
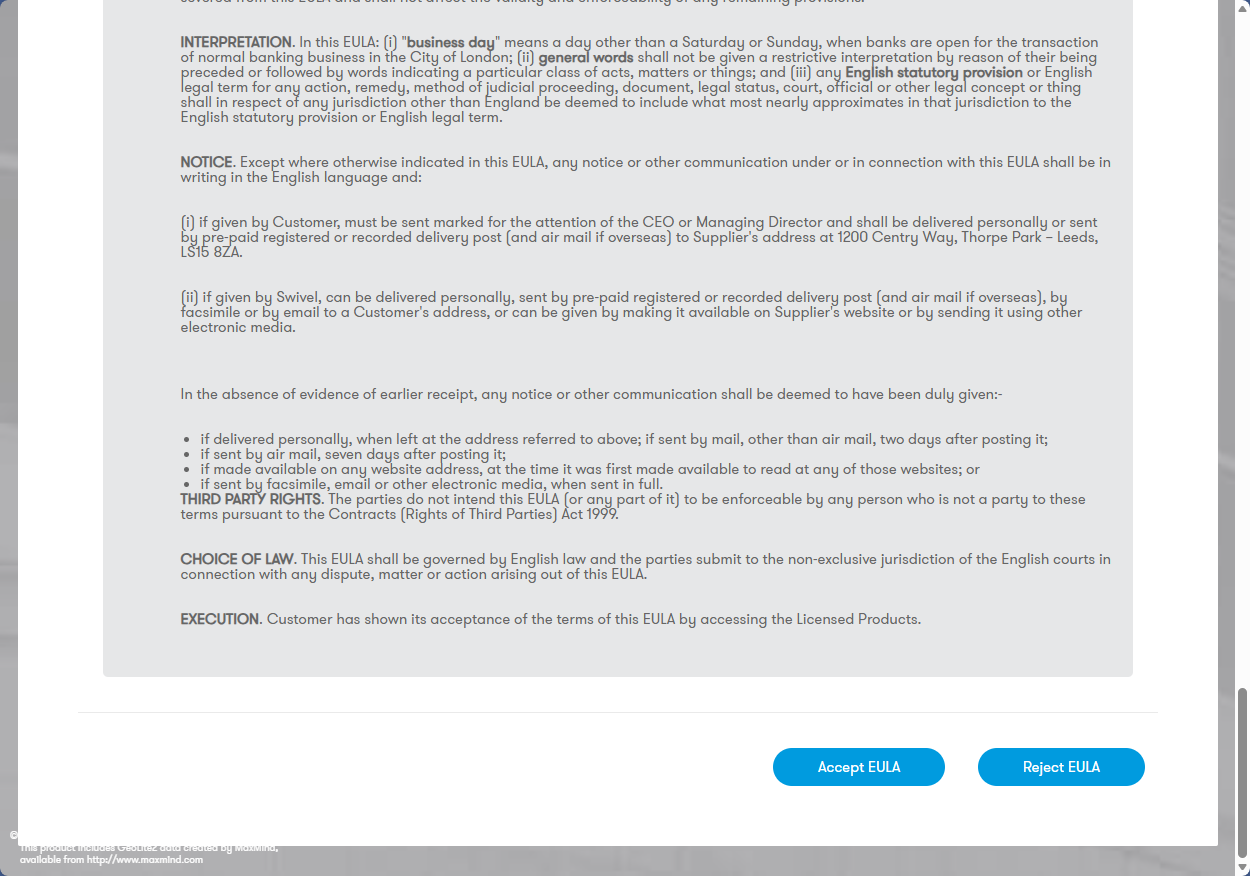
Accept the EULA on your first visit.
If you cannot access the Sentry Admin Console, restart Tomcat via the CMI and wait 30 seconds before retrying.
Settings
You generally access the Adaptive Authentication Admin console using the same credentials as a Swivel Admin on the Core server. However, settings may need adjustment for non-standard installations.
Note
The instructions below refer to <swivelhome>. On a standard appliance, this path is /home/swivel/.swivel.
Configuration is located in <swivelhome>/sentry/settings.properties.
Core Communication: This section dictates how Sentry communicates with the Core Server. Change the default secret before production deployment.
pinsafessl=false
pinsafeserver=localhost
pinsafecontext=sentry
pinsafesecret=secret
pinsafeport=8181
Image Retrieval: This section dictates how Adaptive Authentication retrieves security images (TURing/PINpad) from the Core.
imagessl=false
imageserver=localhost
imagecontext=proxy
imageport=443
selfsigned=true
Administration Group: Determines which Core server group a user must belong to for access to the Sentry Admin console.
administrationGroup=SwivelAdmin
This attribute can be configured via CMI: Appliance Menu > Sentry Menu > Set Administration Group.
Accessing the Web Administration Console
Once configured, browse to https://<SWIVEL_HOSTNAME>/sentry and click the Admin Login link. Log in using your Core Sentry administration credentials. Here, <SWIVEL_HOSTNAME> is the IP address or host name by which the Swivel appliance is accessed.
Troubleshooting Login
No TURing image: Verify
settings.propertiesimage settings.Session starts but no auth request: Verify
pinsafeserversettings insettings.properties.Agent not authorised: Ensure an Agent is defined on the Core for localhost (127.0.0.1) and the secret matches
pinsafesecret.Authentication successful but access denied: Ensure the user is in the group defined by
administrationGroup(e.g., SwivelAdmins).Cannot reach Admin Console: Check
<swivelhome>/sentry/security.properties. The defaultadmin.iprange=0.0.0.0/0allows all IPs. Restrict this (e.g.,192.168.0.0/16) for security.
Setup Sentry Keys & URL
Before configuring Single Sign-On (SSO), define the application URL and Keys.
Application URL: Set via CMI: Appliance Menu > Sentry Menu > Set Application Root URL.
Keys: Required to secure communication with Cloud Services.
Retrieve the certificate generated earlier via the View Keys menu option in Swivel Sentry.
Viewing Certificate and Metadata
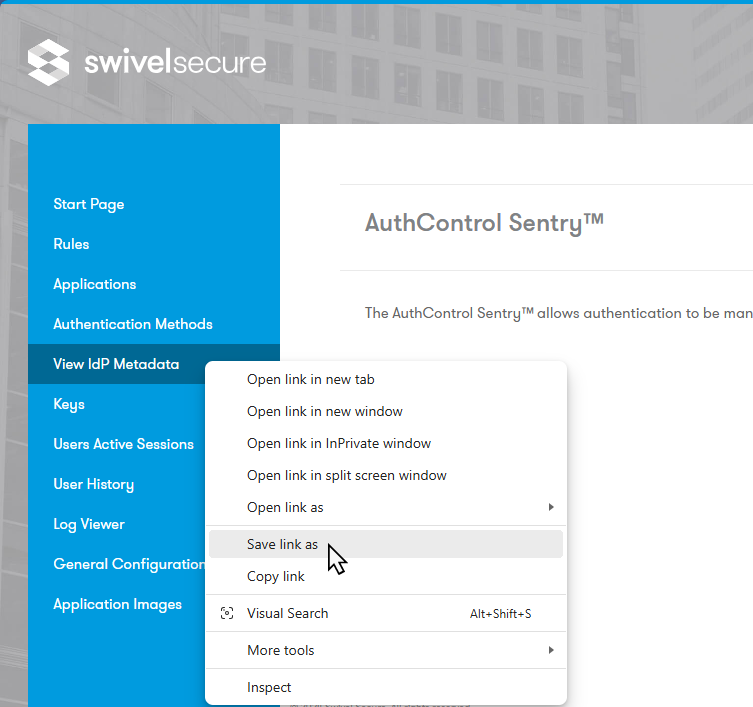
Cloud services require your certificate to trust the Sentry IdP. This is contained within the Sentry IdP Metadata, accessed by right clicking View IdP Metadata link and clicking Save As to download the generatedMetadata.xml file.
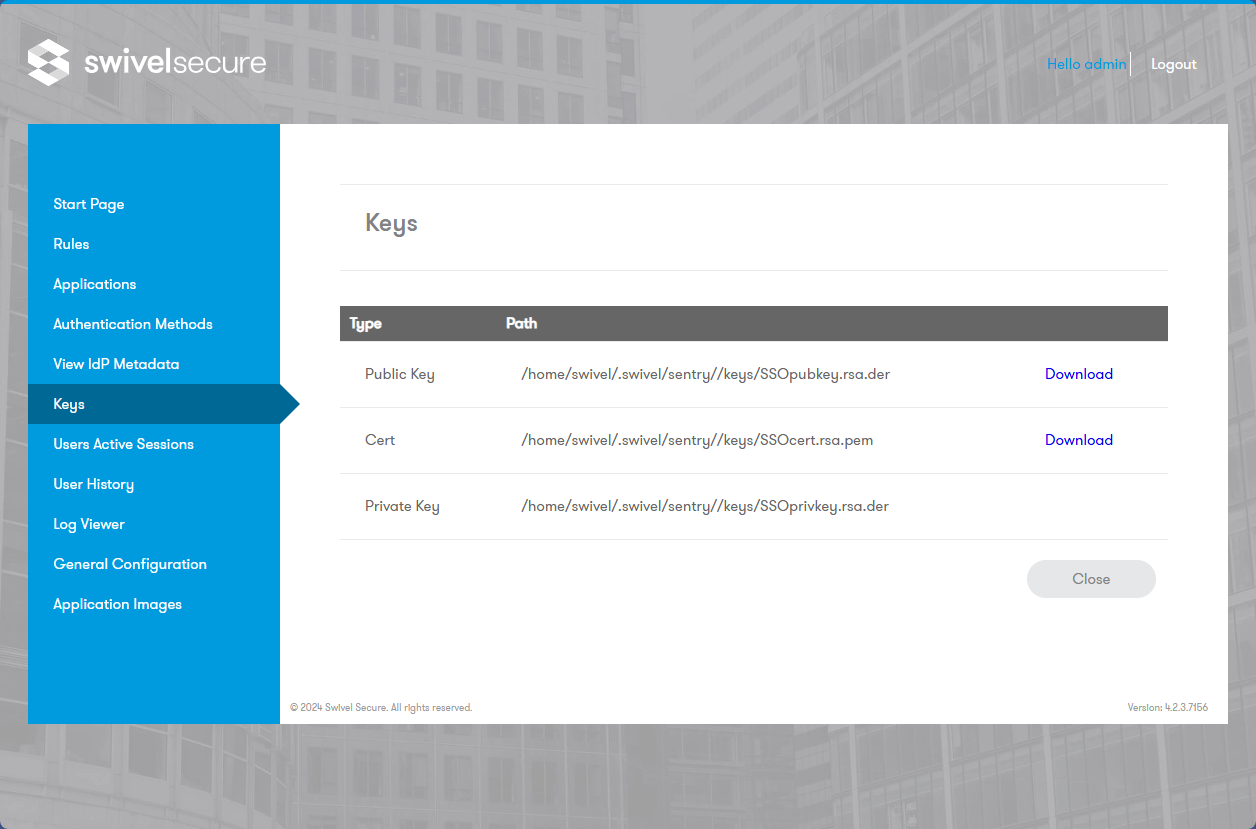
If the Service Provider cannot import metadata, you can download the Public Key and Certificate manually from the Admin Console.
The downloaded generatedMetadata.xml file contents should look something like this. Crucially, it will have your fully qualified domain name in the entityID value and not the default 127.0.0.1 IP address.
<?xml version="1.0" encoding="UTF-8"?>
<md:EntityDescriptor
   entityID="https://sso.swivelsecureonline.com/sentry/saml20endpoint" xmlns:md="urn:oasis:names:tc:SAML:2.0:metadata">
   <md:IDPSSODescriptor WantAuthnRequestsSigned="false"
      errorURL="https://sso.swivelsecureonline.com/sentry/errorsaml"
      protocolSupportEnumeration="urn:oasis:names:tc:SAML:2.0:protocol" validUntil="2026-11-20T10:52:27.210Z">
      <md:KeyDescriptor use="signing">
            <ds:KeyInfo xmlns:ds="http://www.w3.org/2000/09/xmldsig#">
               <ds:X509Data>
                  <ds:X509Certificate>MIIETzCCAzegAwIBAgIUNtG2l+M3Fw8fwGhgRcPZawY7h78wDQYJKoZIhvcNAQELBQAwgbYxCzAJ
BgNVBAYTAkdCMRcwFQYDVQQIDA5XZXN0IFlvcmtzaGlyZTEOMAwGA1UEBwwFTGVlZHMxGjAYBgNV
BAoMEVN3aXZlbCBTZWN1cmUgTHRkMRkwFwYDVQQLDBBEZXZlbG9wbWVudCBUZWFtMSMwIQYDVQQD
DBpzc28uc3dpdmVsc2VjdXJlb25saW5lLmNvbTEiMCAGCSqGSIb3DQEJARYTaHFAc3dpdmVsc2Vj
dXJlLmNvbTAeFw0yNTExMjAxMDQ3MjRaFw0zNTExMTgxMDQ3MjRaMIG2MQswCQYDVQQGEwJHQjEX
MBUGA1UECAwOV2VzdCBZb3Jrc2hpcmUxDjAMBgNVBAcMBUxlZWRzMRowGAYDVQQKDBFTd2l2ZWwg
U2VjdXJlIEx0ZDEZMBcGA1UECwwQRGV2ZWxvcG1lbnQgVGVhbTEjMCEGA1UEAwwac3NvLnN3aXZl
bHNlY3VyZW9ubGluZS5jb20xIjAgBgkqhkiG9w0BCQEWE2hxQHN3aXZlbHNlY3VyZS5jb20wggEi
MA0GCSqGSIb3DQEBAQUAA4IBDwAwggEKAoIBAQDFSb1KZozrCzPDIgQQIsU4DwiiJdyOE0zVfYuj
mH5MLPuYqwEKZG3lPxUH5hL4JahkKfiJwbs8oumU+ERjO9eXNPqha9d1II0THOwrJgixMagzRMOR
+jK5C8P3hxopk+nZpWZY4hEPWiascrc5/eQtx2CK0EjhSCesLqjBVc6xoPtSRR1GgZJ6LKsL+uBa
/Hbqd2jmFwAMPBRvpHsuDMe1JsqPAaDuie4wICtj7SD/SXarz3VsOoXyCtjl8vQMTUs2n4Un8bqI
DR2szgcMZ901BduBTnQcHl/qDL7zQJl0ni4ppY9TeKV41nw008Jr2rjQVJoDPZcaMf/zfK0TVmir
AgMBAAGjUzBRMB0GA1UdDgQWBBSILrv1jEtiSTUUF4JEATRSX1N0nzAfBgNVHSMEGDAWgBSILrv1
jEtiSTUUF4JEATRSX1N0nzAPBgNVHRMBAf8EBTADAQH/MA0GCSqGSIb3DQEBCwUAA4IBAQBCrohn
laZG53BtueHiKVfIxrRfU0p3izF1FmVT60AUF0NqNzlnvUBs87tNeKTwphZwxxDqUQTmC7Q2csQJ
TKv1dRD6hyDFPU25XFkgrFrUy7c+IeJZ5A2laAZXEIvLMGh0UPrZQ9CDh+BhghKNODpC8clSSqEF
U/fQkhnYfUbBdmp+mHyCJ5mAcKID2jwYI+cT9yH5pZv2n5+y2nNzBMFeNP4Xi7QcvjH3wzgjdDWL
GV2DNbaaOM3QGXjDpfKmOGTyb/u2sJARcz4hGJphNB+ZyMoLi1a7MlM2Hw/oMLgpAl9P2Gtf1DjS
ME6rtCcqLiw6SCi06x4Qd1WUtvp3clkx</ds:X509Certificate>
               </ds:X509Data>
            </ds:KeyInfo>
      </md:KeyDescriptor>
      <md:SingleLogoutService
            Binding="urn:oasis:names:tc:SAML:2.0:bindings:HTTP-POST" Location="https://sso.swivelsecureonline.com/sentry/singlelogout"/>
      <md:NameIDFormat>urn:oasis:names:tc:SAML:2.0:nameid-format:persistent</md:NameIDFormat>
      <md:SingleSignOnService
            Binding="urn:oasis:names:tc:SAML:2.0:bindings:HTTP-POST" Location="https://sso.swivelsecureonline.com/sentry/saml20endpoint"/>
   </md:IDPSSODescriptor>
</md:EntityDescriptor>
Defining Applications
Applications typically integrate via federation standards (SAML, ADFS) or via Swivel Secure’s Proprietary Claims (for legacy apps/VPNs).
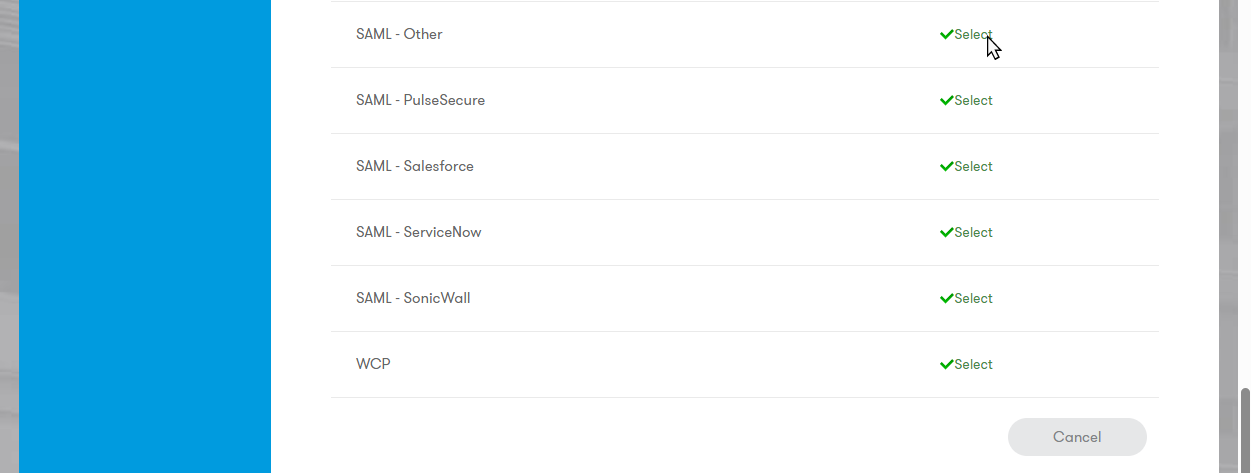
To create a new application, navigate to Applications and click Add Application.
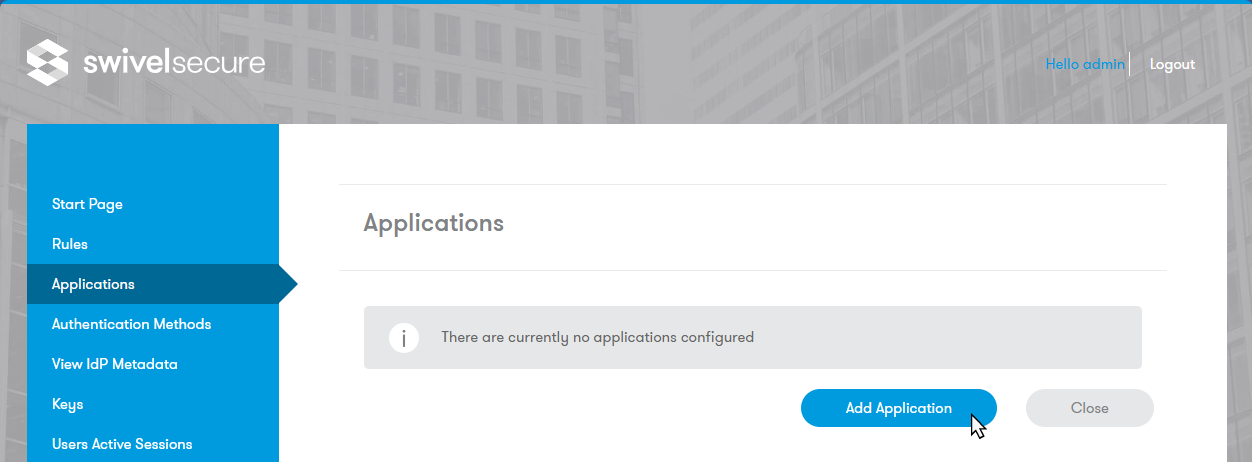
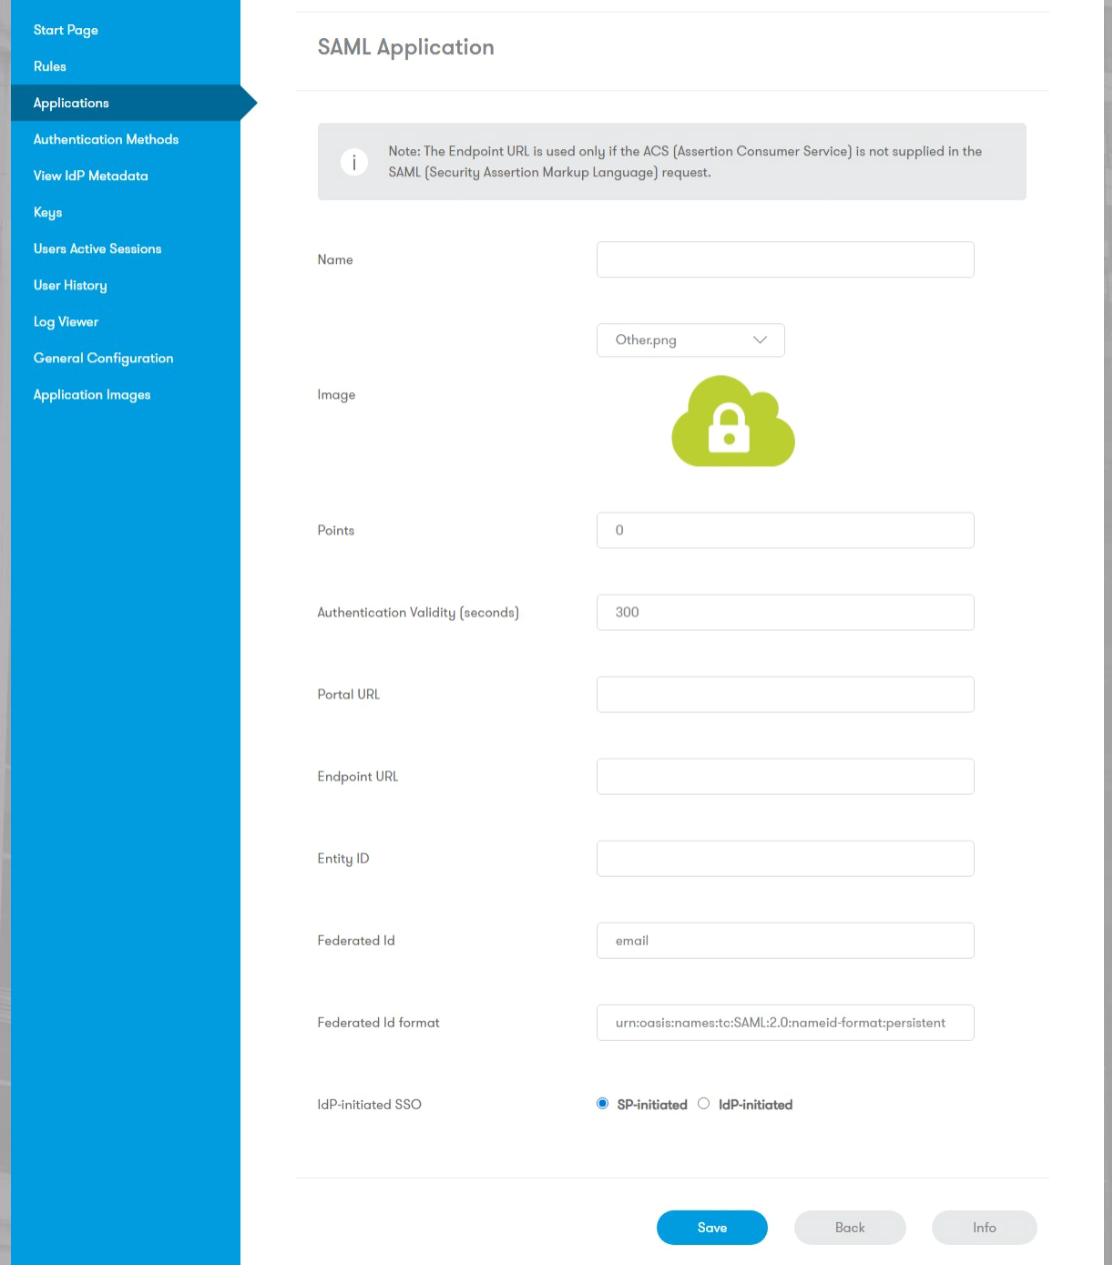
Select the appropriate type from the list. Use SAML-Other or RADIUS VPN-Other for custom integrations.
By default, Sentry returns the Federated ID.
Note
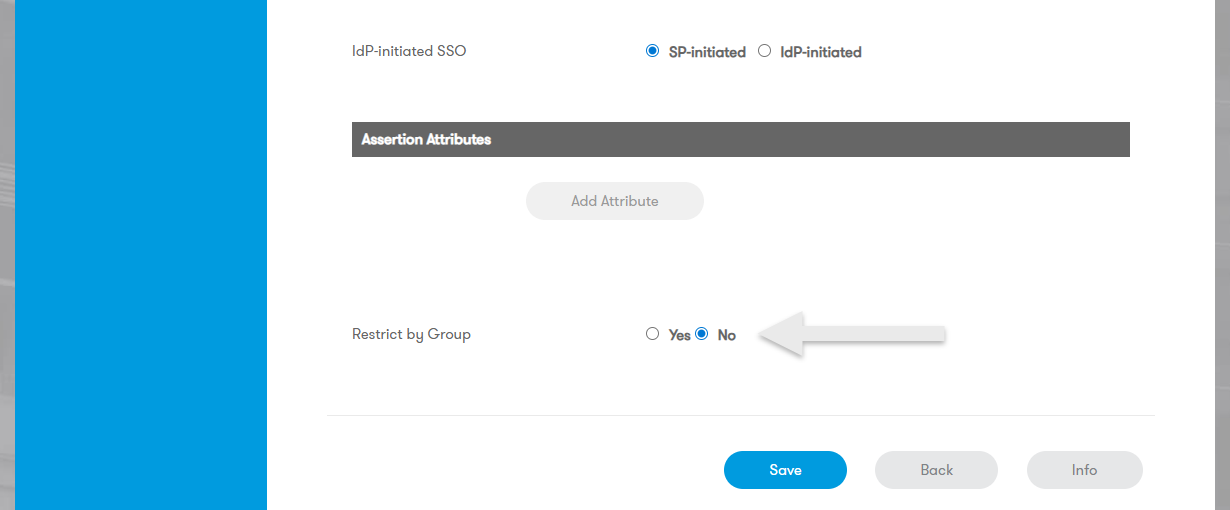
Additional SAML assertions can be configured by clicking Add Attribute. However, this button is only available once you’ve saved the new Application entry. You will need to go back and Edit it, to see the Add Attribute button. These attributes must correspond to Custom Attributes defined in the Core.
Application Images: Default icons are provided. To upload custom icons, navigate to the Application Images section.
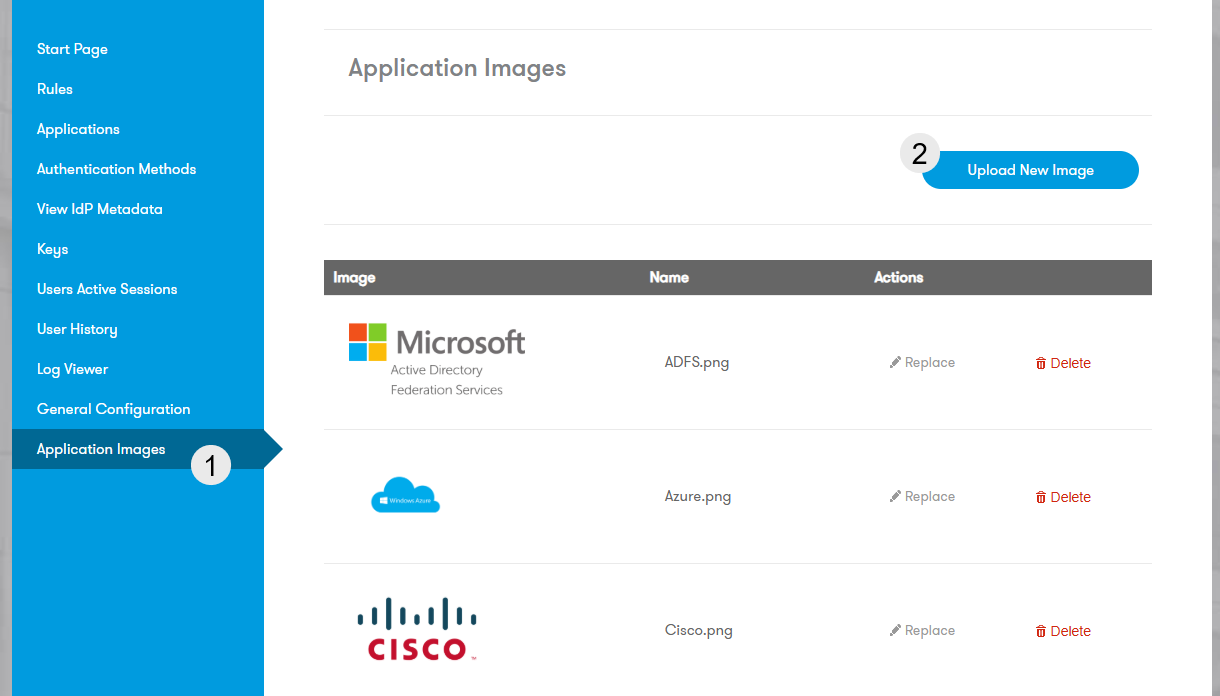
Note
Images you’ve imported always tend to appear at the bottom of the Application Images screen.
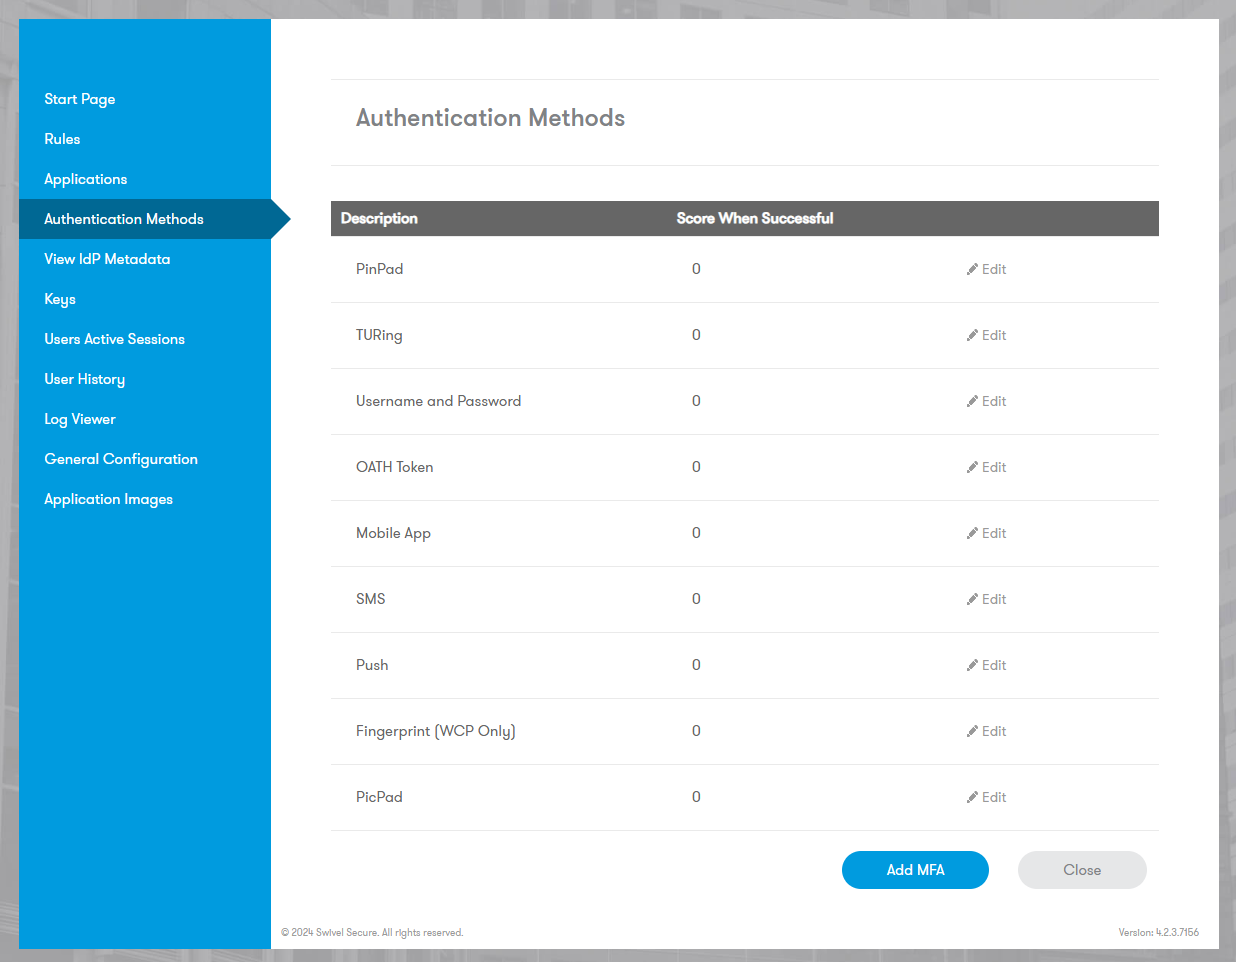
Defining Authentication Methods
Sentry assigns “points” to authentication methods. Stronger authentication methods are allocated higher points.
Example Scenario:
High Security App: Requires 200 points.
Low Security App: Requires 100 points.
Token Auth: Worth 200 points.
TURing/PINpad: Worth 100 points.
A user accessing the High Security App is forced to use Token Auth. A user accessing the Low Security App can use TURing, PINpad, or Token.
Supported Authentication Types:
Username and Password: Repository password check (e.g., AD).
TURing: Image-based authentication.
PINpad: Image-based authentication.
PICpad: Image-based authentication.
SMS: SMS-based One Time Code.
Mobile App: AuthControl Mobile Client.
Push: AuthControl Sentry Push Notification.
Fingerprint (AuthControl Desktop): Fingerprint (specific to AuthControl Desktop for Windows)
OATH Token: Physical Hardware Token / or OATH configured mobile app
Note
All authentication types also perform a repository password check unless you explicitly disable the password field and disable password checking against the Swivel Core agent associated with the AuthControl Sentry SSO (typically the ‘local’ agent under Server -> Agents).
Note
If a method is set to 0 points, it is considered disabled for this installation.
User Experience: By default, users are offered the method with the lowest sufficient points, but can choose alternatives.
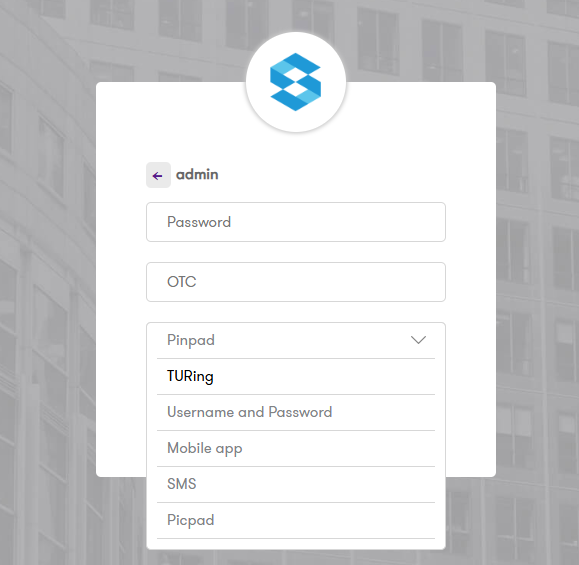
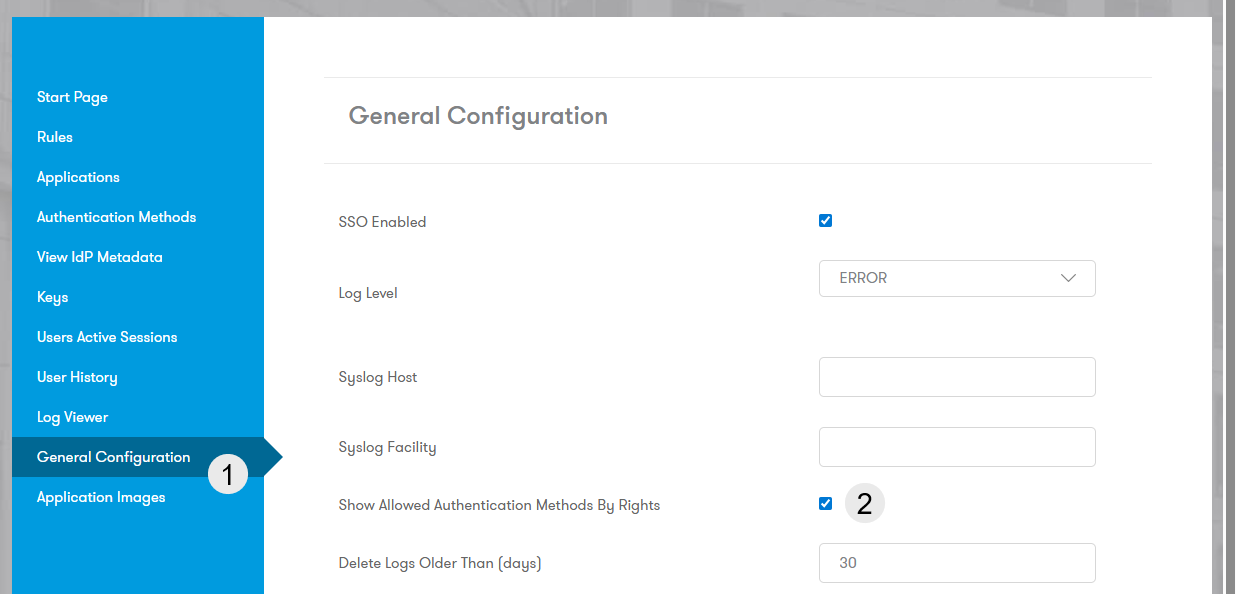
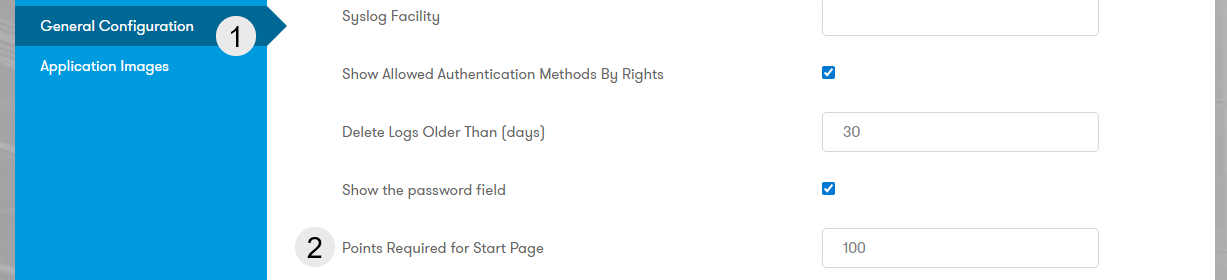
To restrict options, go to General Configuration and check Show Allowed Authentication Methods By Rights:
Defining Sentry Rules
Sentry Rules add dynamic context to the authentication process, adjusting the user’s Trust Score based on risk factors. Scores can be positive (adding trust) or negative (reducing trust).
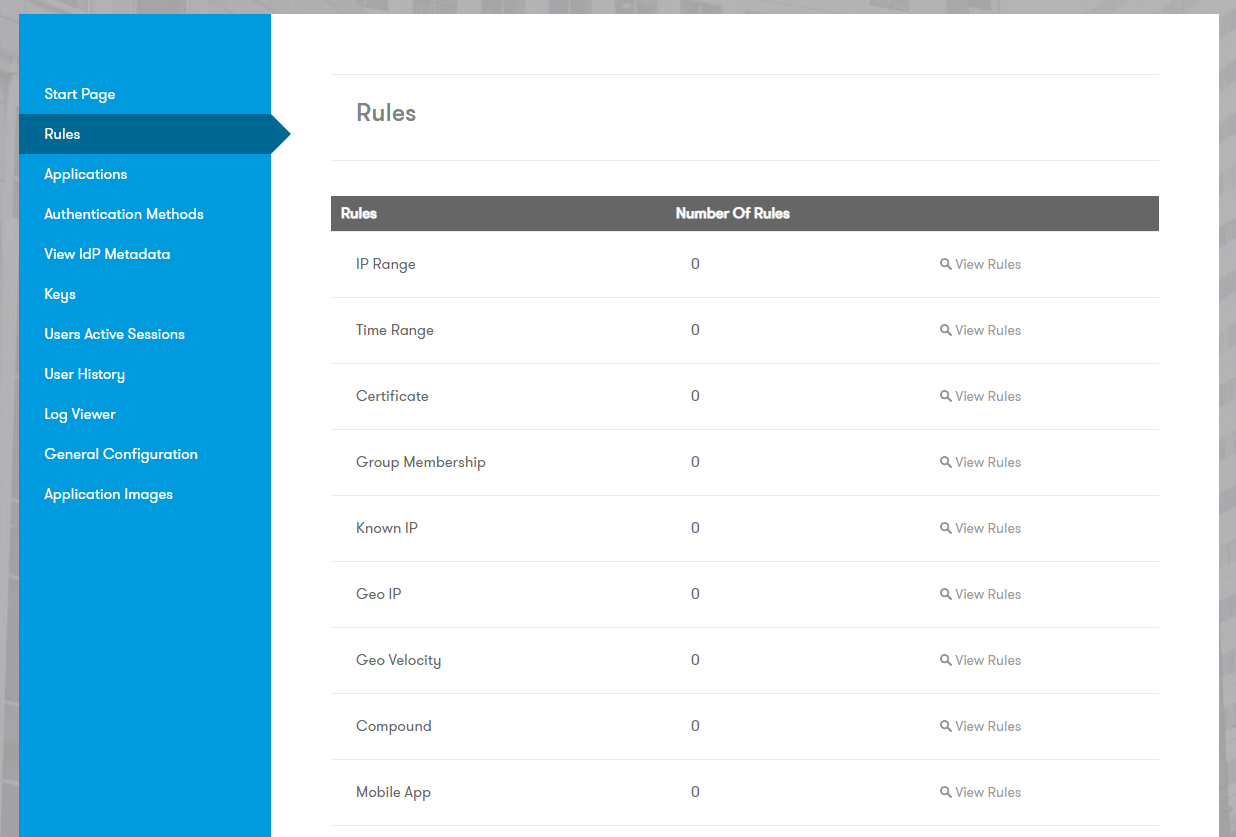
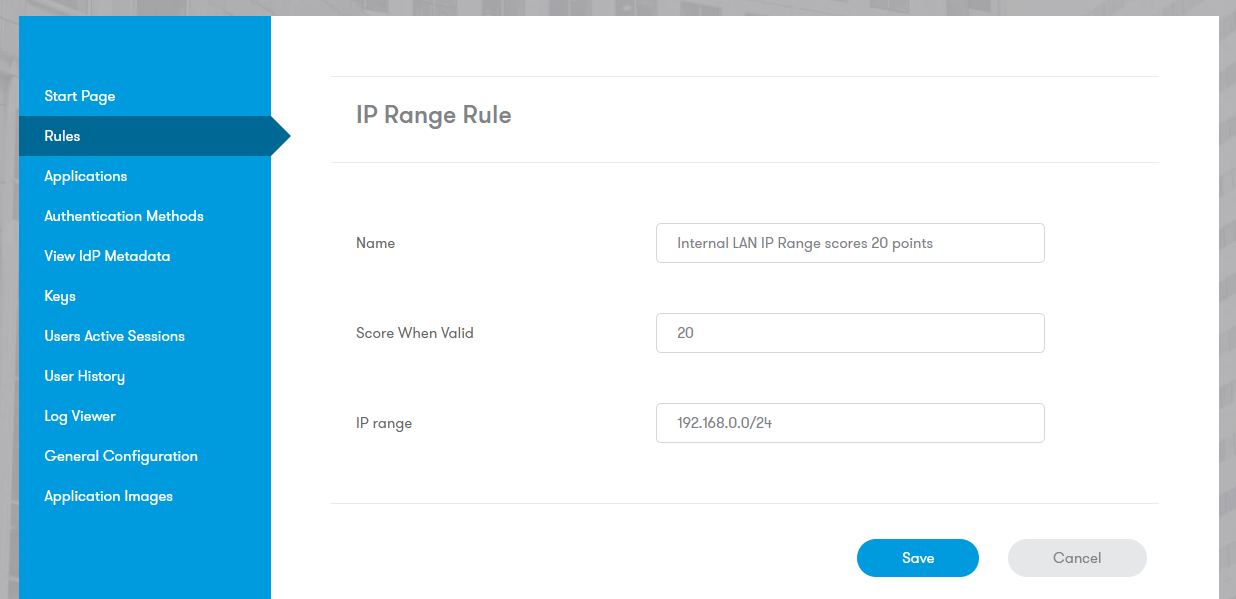
IP Range (Allow/Deny)
Add points for whitelist IPs or deduct points for blacklist IPs.
Parameter:
IP Address Range (e.g. can be expressed as 192.168.0.0/24 or 192.168.0.0/255.255.255.0)
Time Range
Adjust points based on the time of access.
Parameters:
Start Time
End Time
Certificate
Add points if the user presents a valid client-side X.509 Certificate.
Note
This depends upon importing the Root CA of your PKI solution in order for Sentry to be able to validate browser certificates. Contact supportdesk@swivelsecure.com for assistance on integrating your PKI solution.
Group Membership
Adjust points based on the user’s membership in a specific repository group.
Parameter:
Name of Swivel Group
Note
You can reference AD Groups, but you need to use the Swivel Group Name that you have mapped to the AD Group under Repository -> Groups in the Swivel Core.
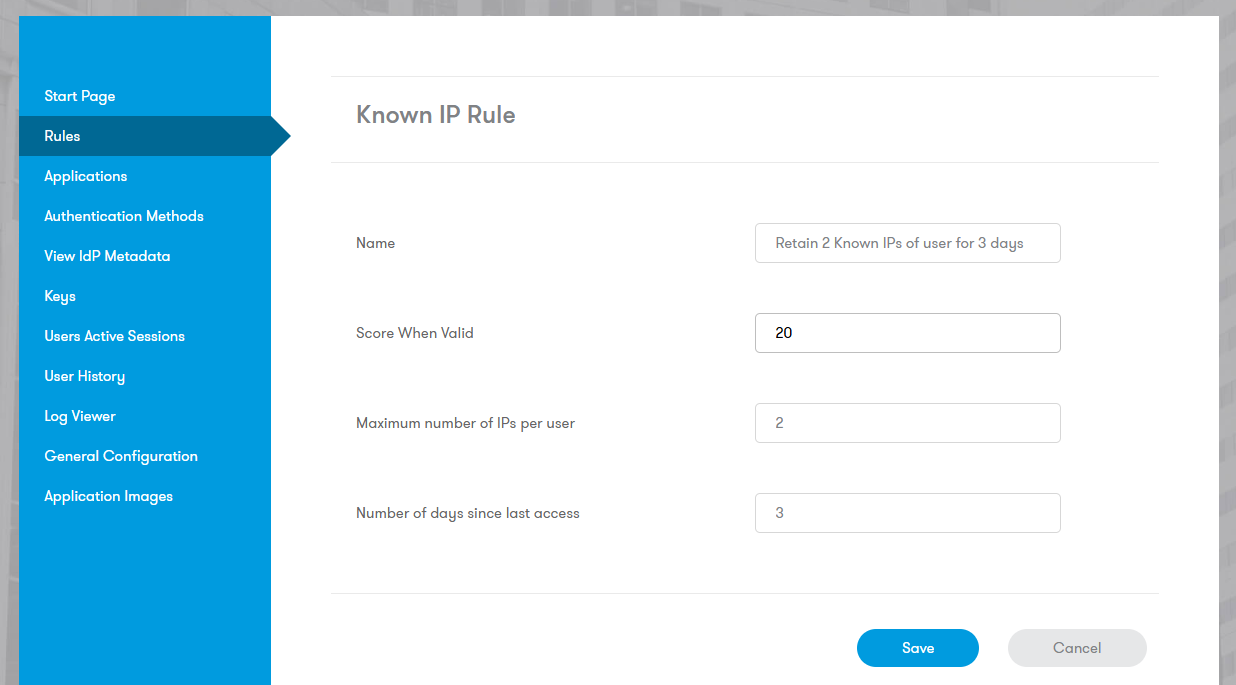
Known IP
Add points if the user accesses the system from an IP address they have successfully used previously. Parameters:
Maximum Number of IP Addresses: History size per user.
Number of Days: Validity period of the IP history.
Geo IP
Important
Rules based on apparent location are deprecated and will be removed in future versions
Adjust points based on the country of origin.
Parameter: Comma-separated ISO-3166 country codes (e.g., GB,FR).

Geo Velocity
Important
Rules based on apparent location are deprecated and will be removed in future versions
Detects “impossible travel” by calculating the speed required to travel between the previous login location and the current one. Parameter: Speed Limit (MPH).

Compound Rules
Combine existing rules using logical operators (AND, OR, XOR, AND NOT) to create complex access policies.
Example: IT Admins logging into M365 receive a score of -50, since we want them to have to login with stronger Authentication or multiple Authentication methods (M365 Application AND IT Admins group scores -50):
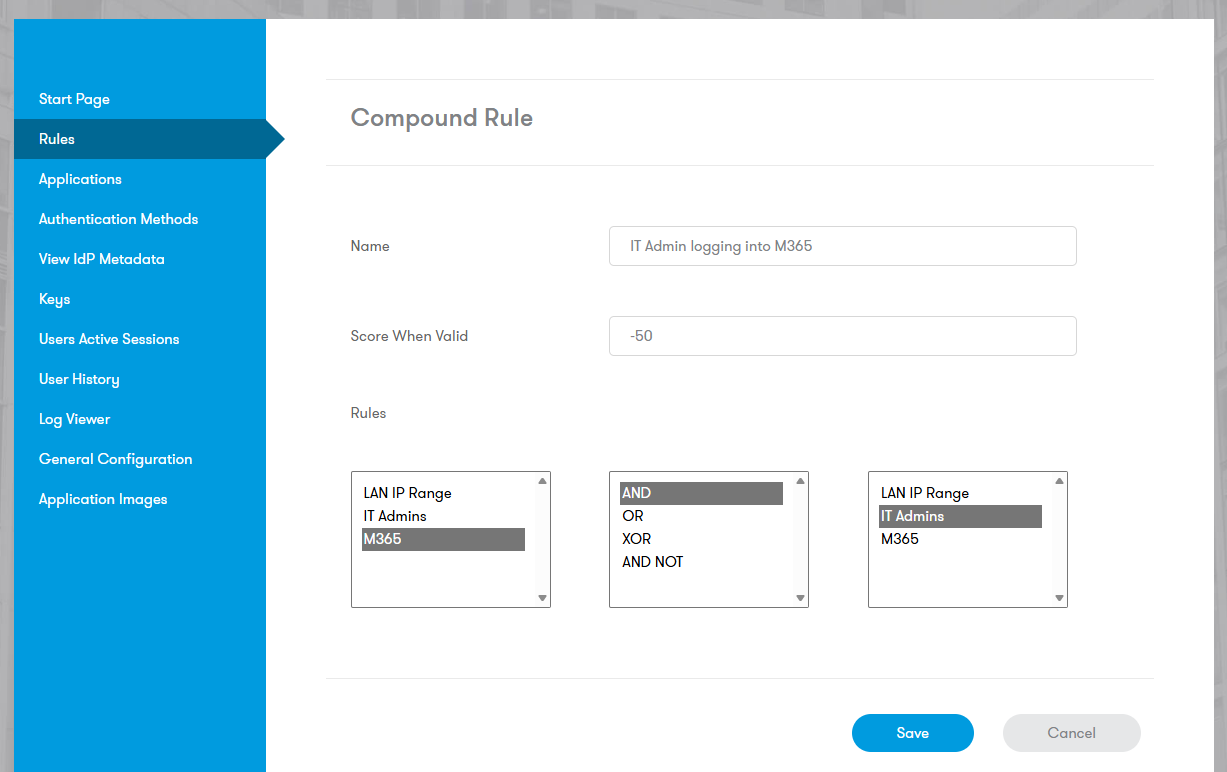
Note
It’s sometimes better to compound rules using element rules that have zero points assigned to avoid the points from the rules themselves being included within the compound rule assessment score. In the example above, the ‘IT Admins’ group rule should be set to zero points and just apply the -50 to the compound rule, to avoid IT Admins scoring negative points for other applications.
Single Sign-On (SSO) & Start Page
SSO Functionality
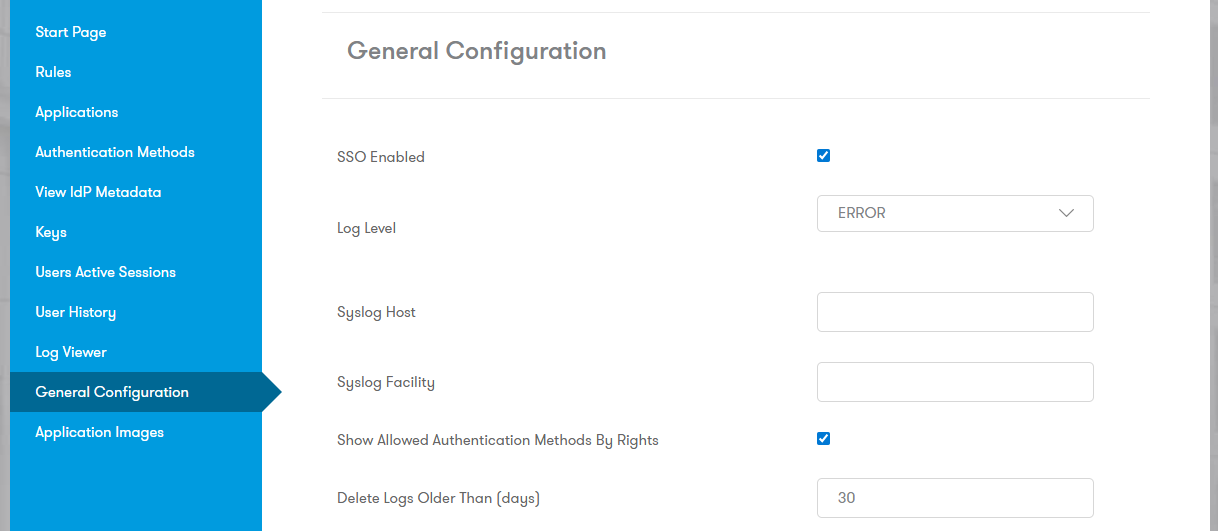
SSO allows a user to carry attained Trust Score points from one application to another within the same browser session. To enable, check SSO Enabled in General Configuration.
Start Page Authentication
You can enforce authentication before the user sees the Application Portal (Start Page).
Go to General Configuration.
Set Points Required for Start Page. * If > 0, the user must authenticate immediately. * If 0, the user sees the portal immediately.
Restrict by Group: You can hide applications from the Start Page based on user groups by selecting the application and clicking Restrict by Group.
General Operation and Diagnosis
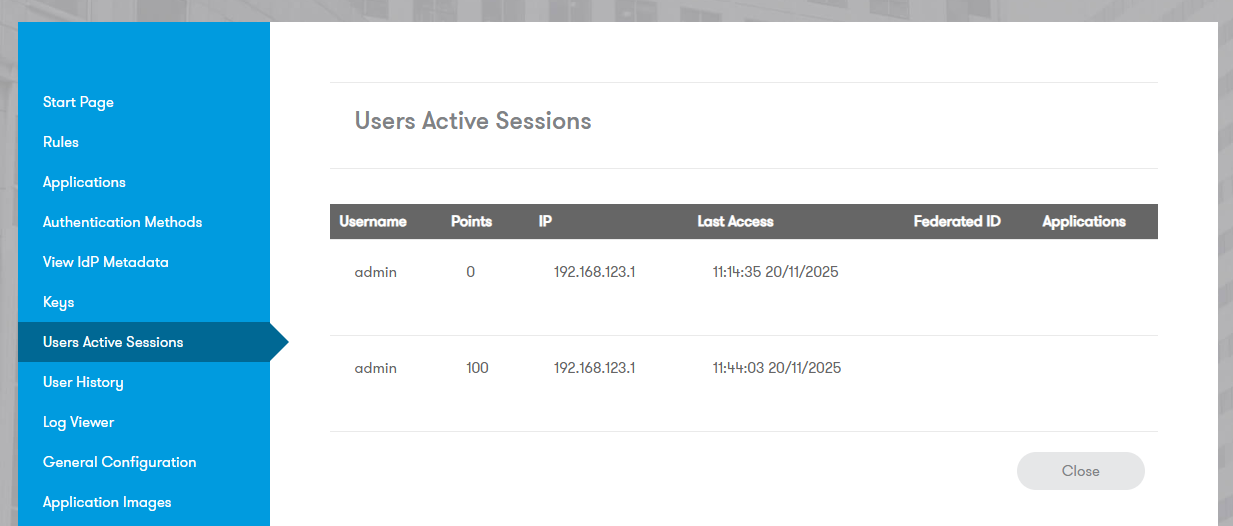
Users Active Sessions
Displays currently logged-in users and their current Trust Score.
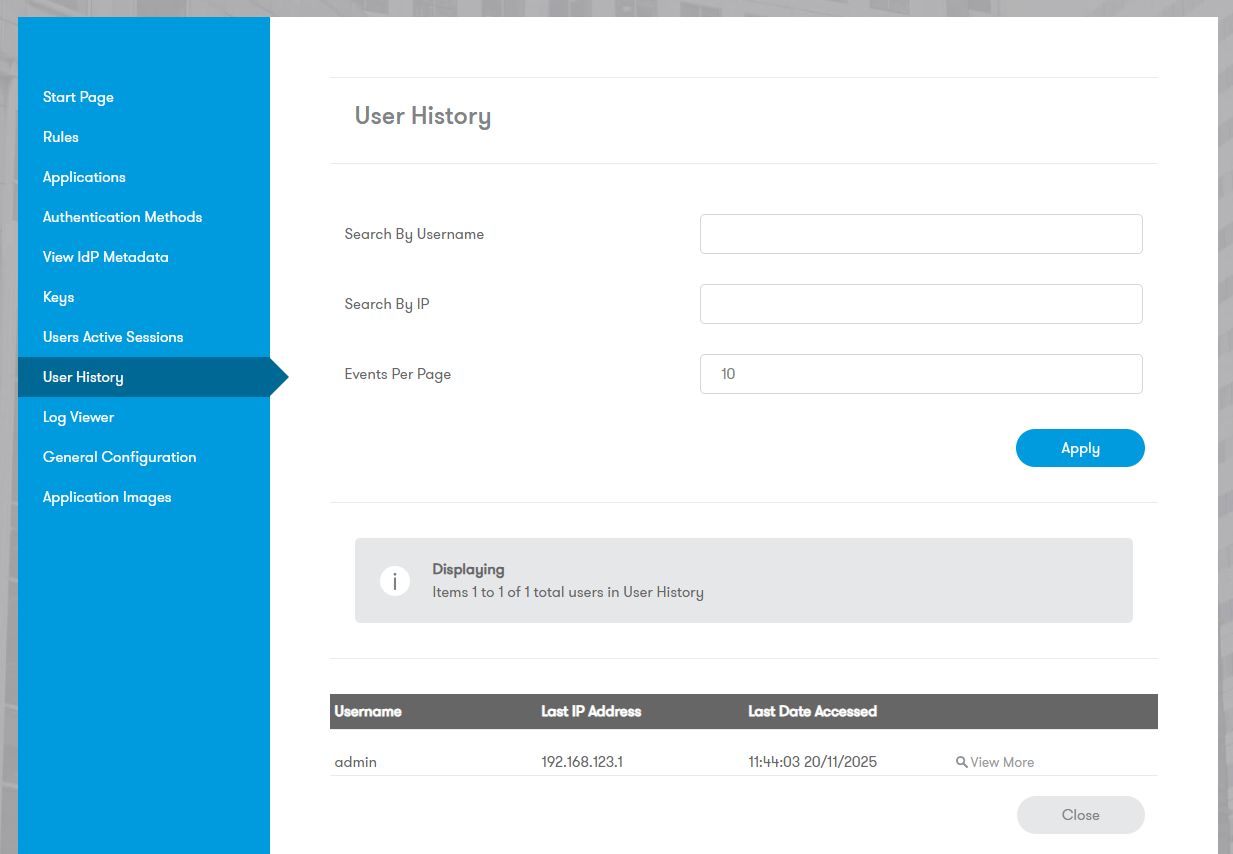
User History
Displays recent login history, IP addresses, dates, and points. Used by the Known IP rule. Administrators can clear user history here.
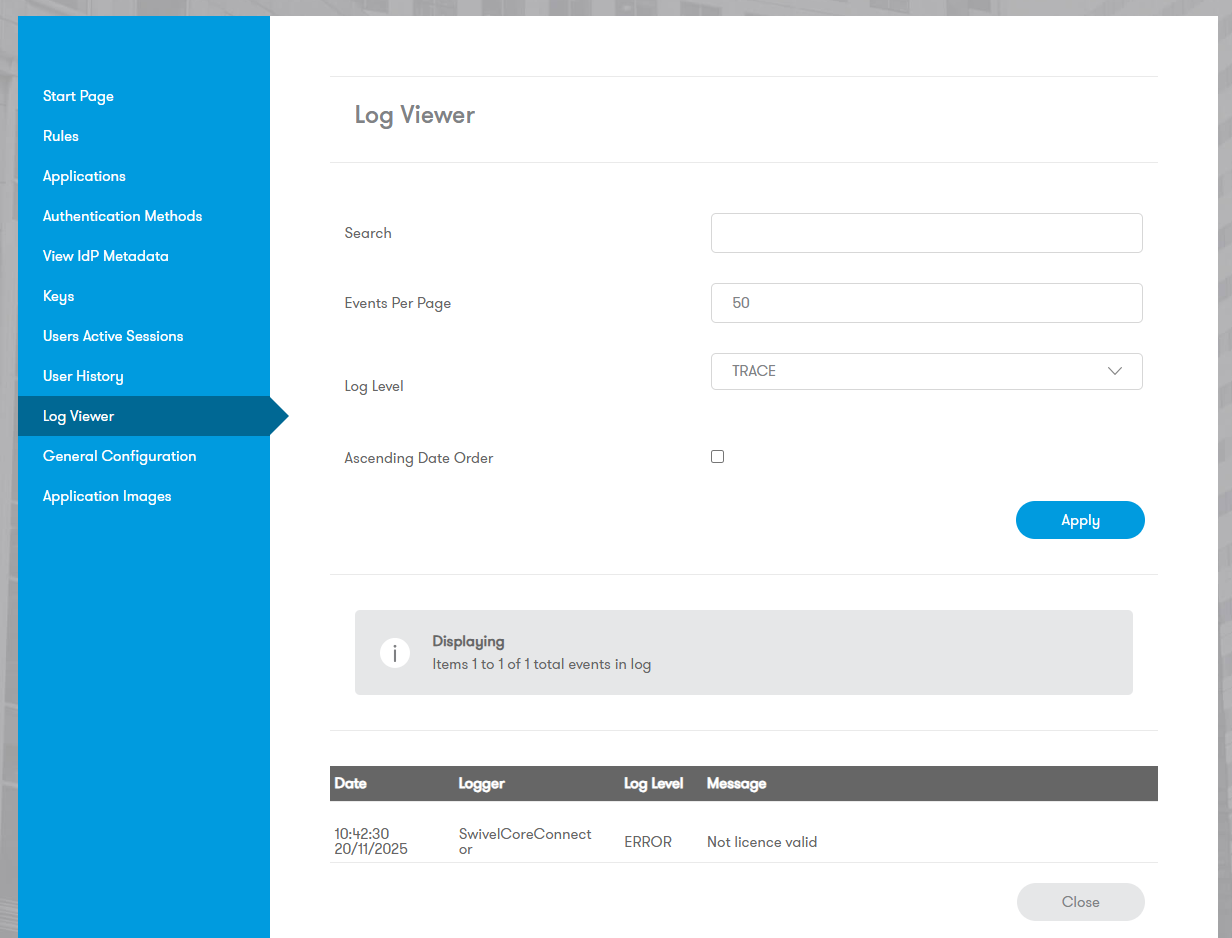
Log Viewer
View authentication events and system logs.
Log Retention: Configure retention in General Configuration under Delete Logs Older Than (days).
Default: 30 days.
0: Never delete.
1: Delete logs older than 24 hours.
Log Level: Set the Log Level to TRACE when diagnosing SAML integrations, but do not leave this on in production.
Addendum: Authentication Flow (Proprietary Claims)
User accesses Sentry Universal Login Page and selects the application (e.g., VPN).
Sentry authenticates the user based on policies and requests a Claim from the Core.
User is redirected to the VPN login page with the Claim passed as the password.
User logs into the VPN with their username and the Claim.
The Core validates the Claim and confirms it was issued for that specific endpoint.
Note
For Proprietary Claims, the Application Name on Sentry must match the NAS Name on the Core.