Pulse Secure SAML Integration
Introduction
This article explains how to integrate a PulseSecure SSL VPN with AuthControl Sentry.
Configuring the PulseSecure VPN
Note
It is assumed that your PulseSecure already has a basic, working configuration.
Log into the PulseSecure administration console. From the menu, select “Authentication”, then “Signing In” and “Sign-in SAML”.
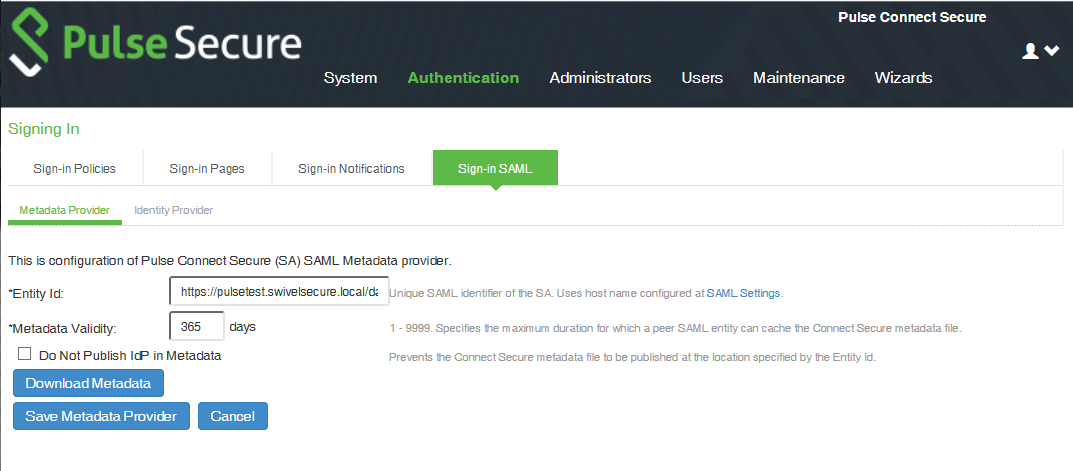
Click the link for “SAML Settings”, at the end of the line for “Entity Id”.
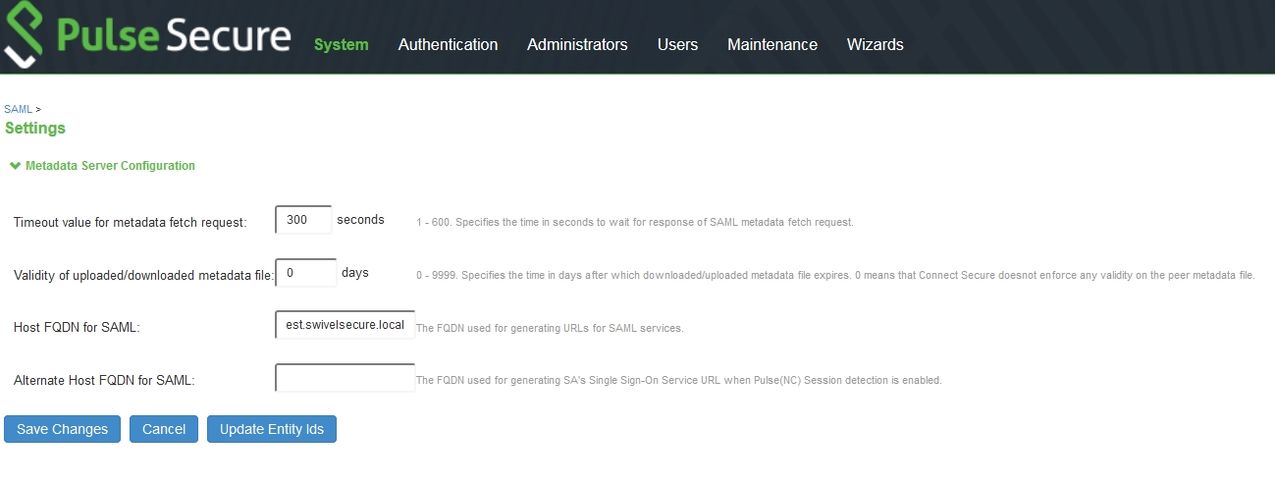
Enter the public host name of your PulseSecure server under “Host FQDN for SAML”, and click “Save Changes”.
Go back to the “Sign-in SAML” page, and ensure that the Entity Id is:
https://<pulse_server>/dana-na/auth/saml-endpoint.cgi
i.e. it should be exactly the same as the Entity ID you put on the Sentry application settings, except for “?p=sp1”.
Now go to “Authentication”, “Auth. Servers”

Select “SAML Server” from the drop-down, then click “New Server…”.
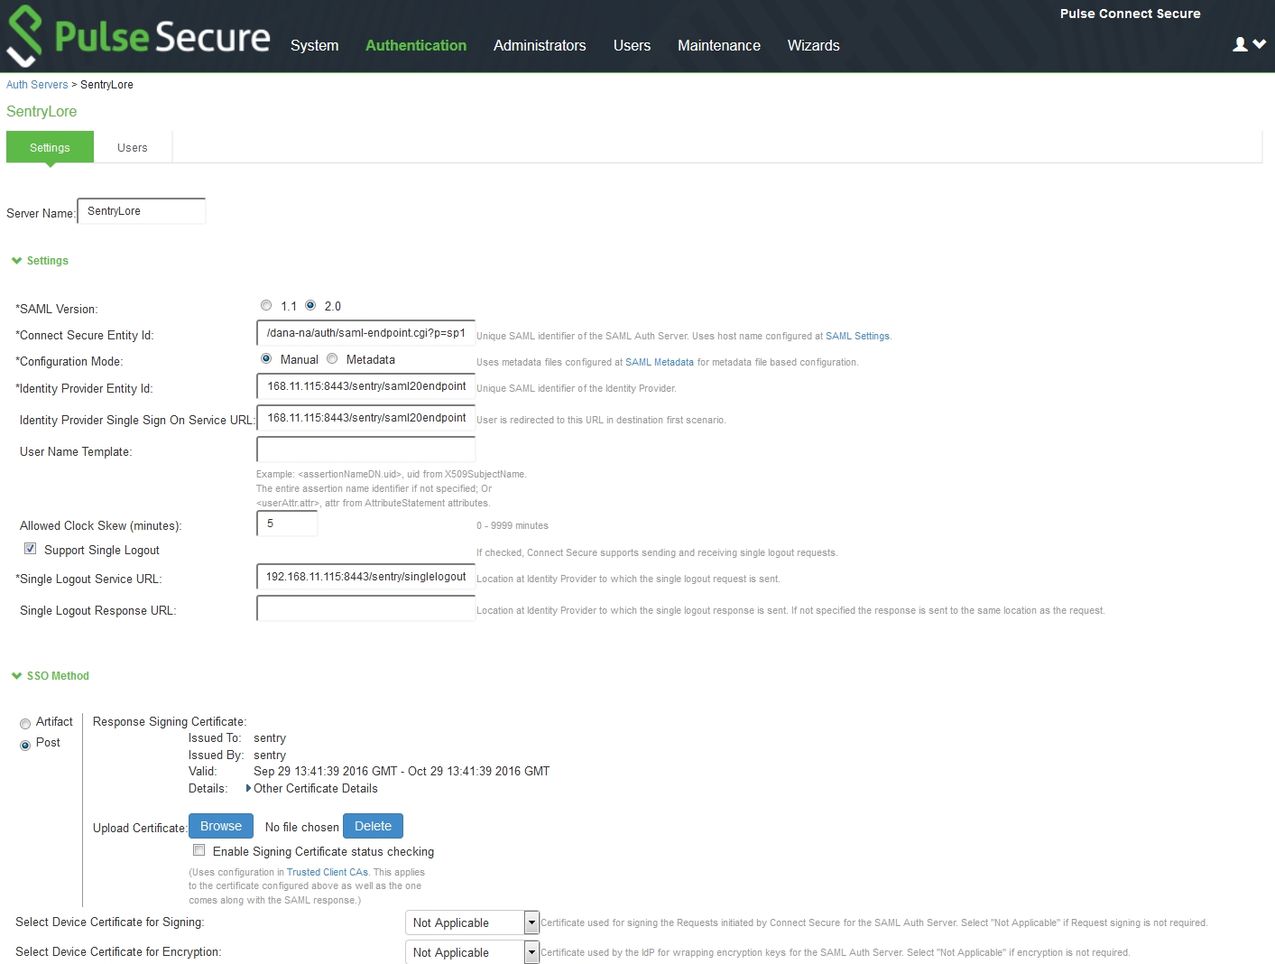
Set a name for the server. Ensure that “SAML Version” is set to 2.0.
“Connect Secure Entity Id” will be set as the unique entity ID for this server. Make a note of it, as you will be entering it in the Sentry configuration page.
For “Identity Provider Entity Id” and “Identity Provider Single Sign On Service URL”, enter:
https://<swivel_server>/sentry/saml20endpoint
Here, ‘’<swivel_server>’’ is the public URL of the Swivel sentry server.
Check “Support Single Logout”, and enter:
https://<swivel_server>/sentry/singlelogout
as the “Single Logout Server URL”. The “Single Logout Response URL” is the same, so can be left blank.
Note
For the next part, you will need a copy of the metadata from the Swivel Sentry server. If you do not already have one, open your browser to: “https://<swivel_server>/sentry/metadata/generatedMetadata.xml”. When the metadata is displayed in your browser, save it to disk.
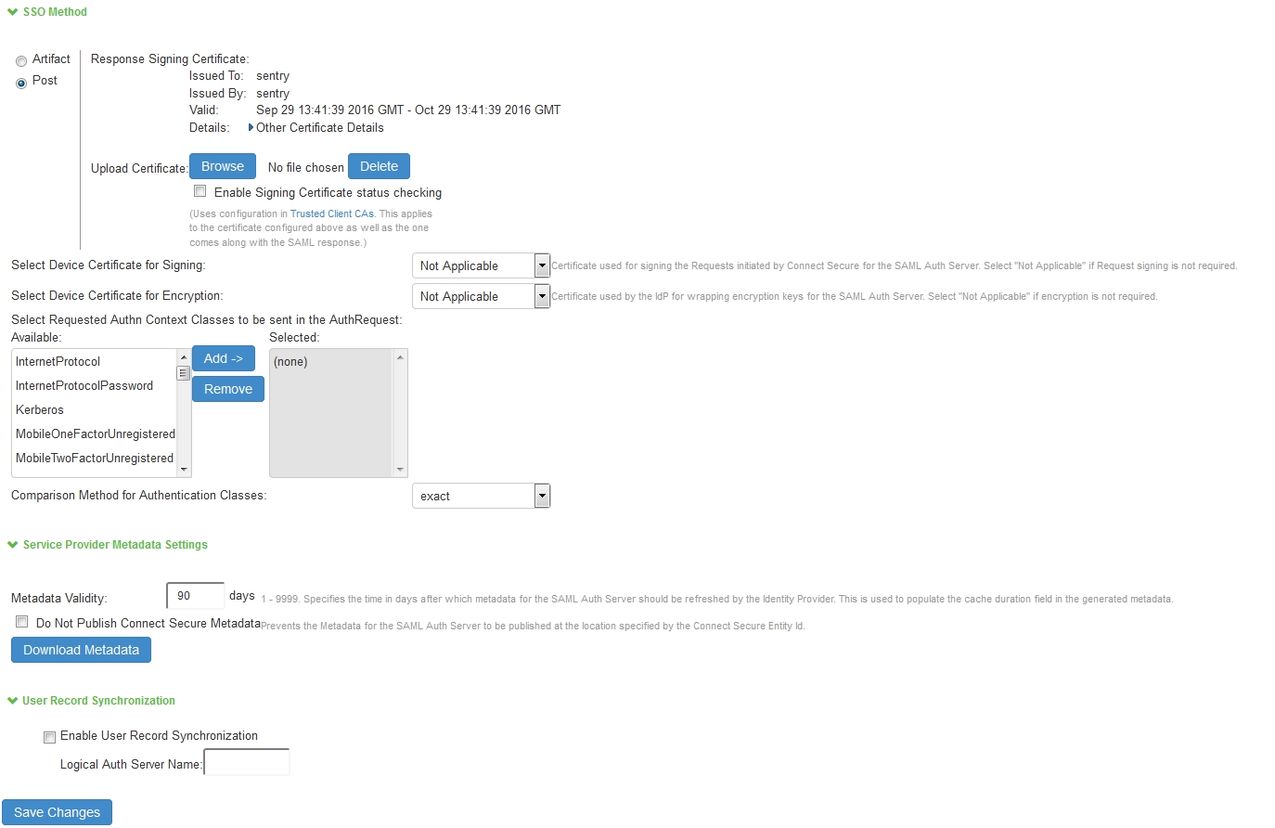
Ensure that “Post” is selected as the “SSO Method”. Click “Browse” next to “Upload Certificate” and select the metadata file you downloaded earlier.
Set a valid value for “Metadata Validity”.
Click “Save Changes”.
Now Select “Users”, then “User Realms”.
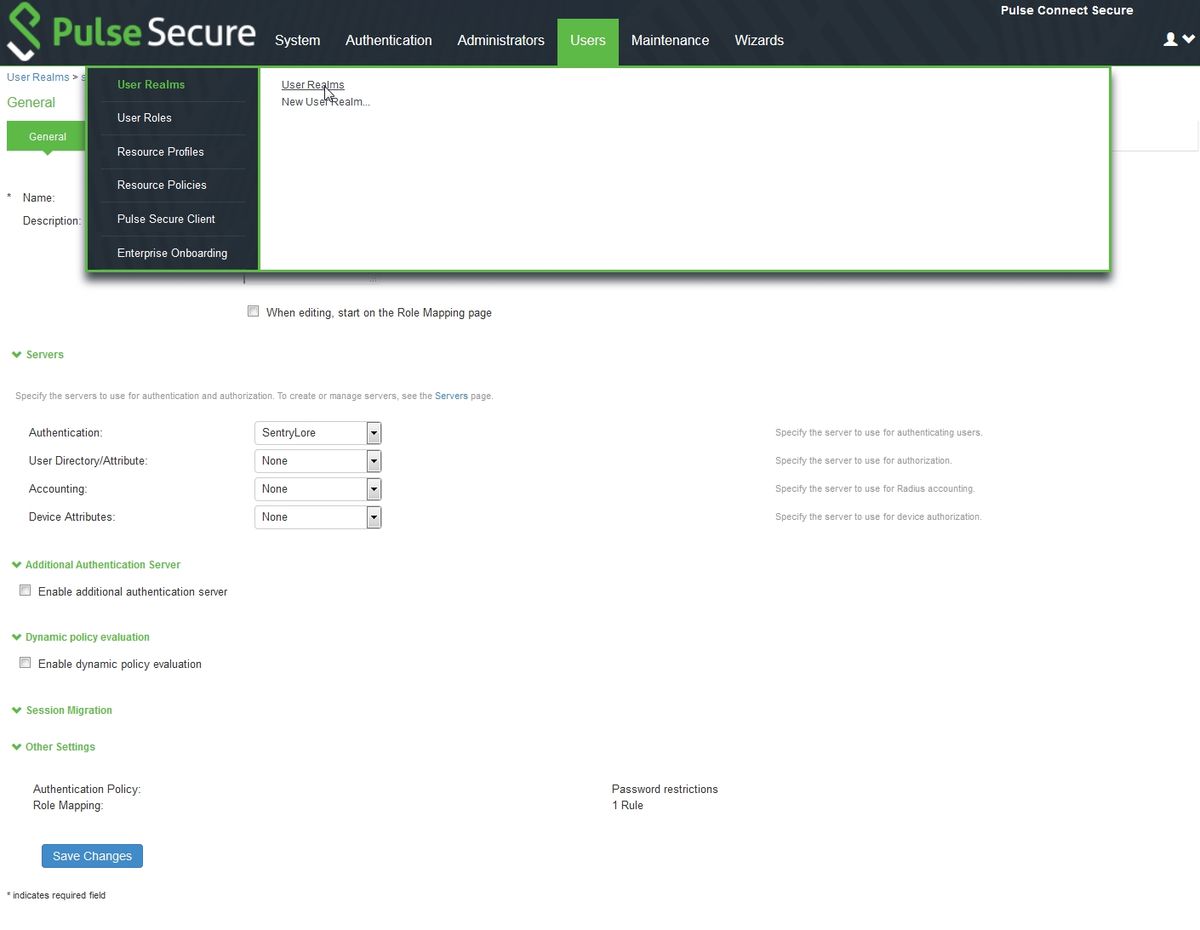
Click “New” to create a new user realm.
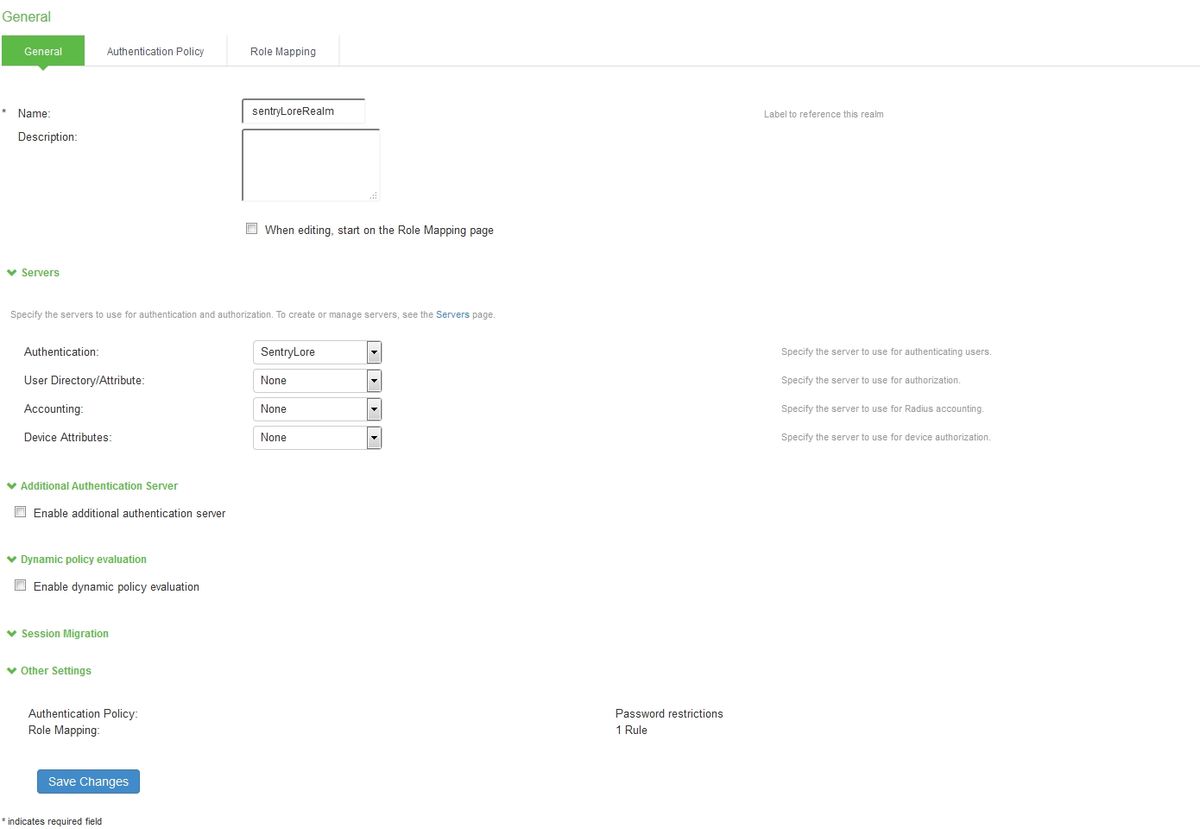
Add a name, then under “Authentication”, select your new authentication server. Click “Save Changes”.
Now under “Role Mapping”, select the role(s) that users will be assigned. For example, in the following role mapping, all users are assigned to the Role “Users”.

Finally, go to “Authentication”, “Signing In”, “Sign-in Policies”. Click “New URL…”. Enter the “Sign-in URL”, then select “User picks from a list of authentication realms” and add the user realm created above. Click “Save Changes”.
Configuring the Sentry Application
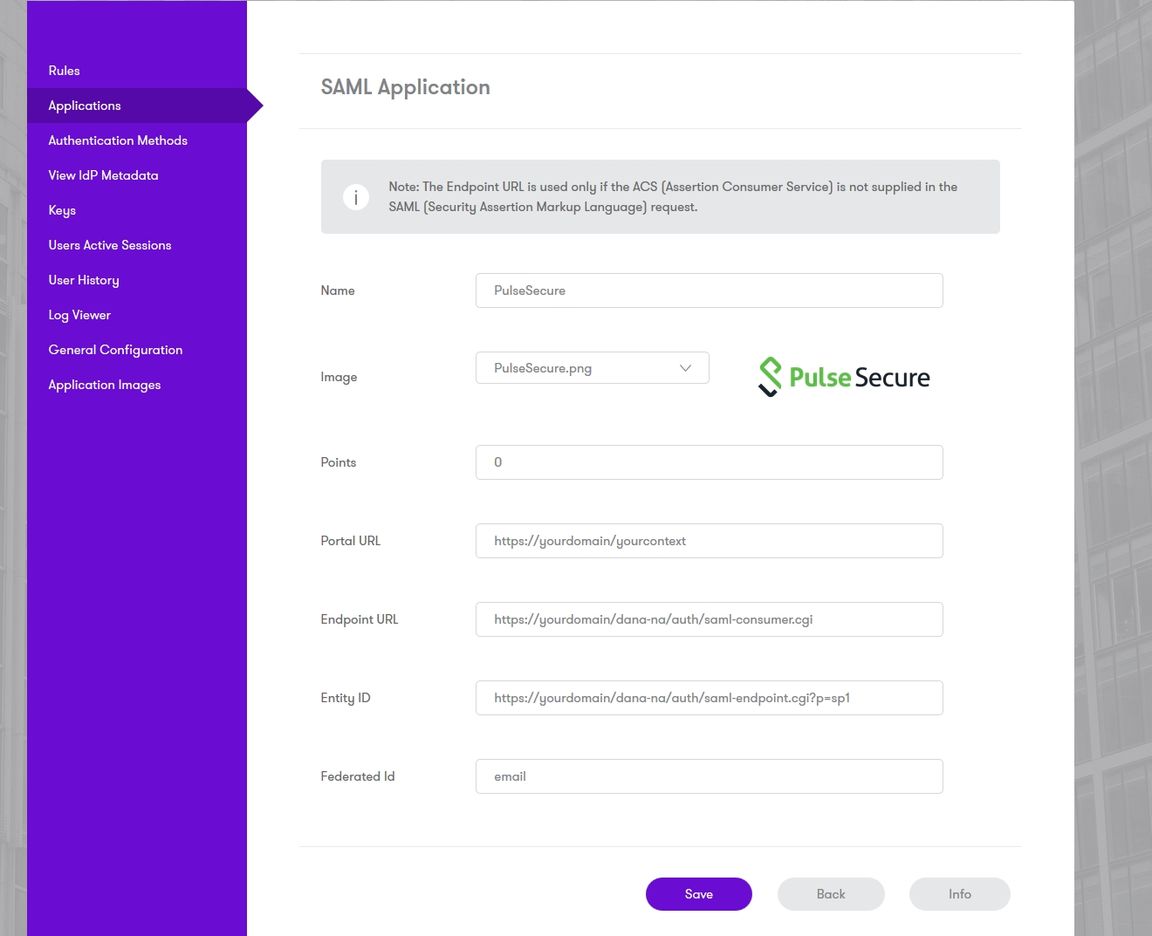
Log into the Sentry administration console. Select “Applications”. Then Click “Add Application” and select “SAML - PulseSecure”
Note
For all the following, replace ‘’<pulse_server>’’ with the public host name for your Pulse server:
Under “Portal URL”, enter the URL for the PulseSecure portal that will be authenticated using Sentry, for example:
https://<pulse_server>/saml
Under “Endpoint URL”, enter:
https://<pulse_server>/dana-na/auth/saml-consumer.cgi
Under “Entity ID”, enter the unique Entity ID you recorded from the PulseSecure authentication server.
Under “Federated Id”, enter “email”.
Testing authentication to PulseSecure via AuthControl Sentry
This should be the final step after all previous elements have been configured.
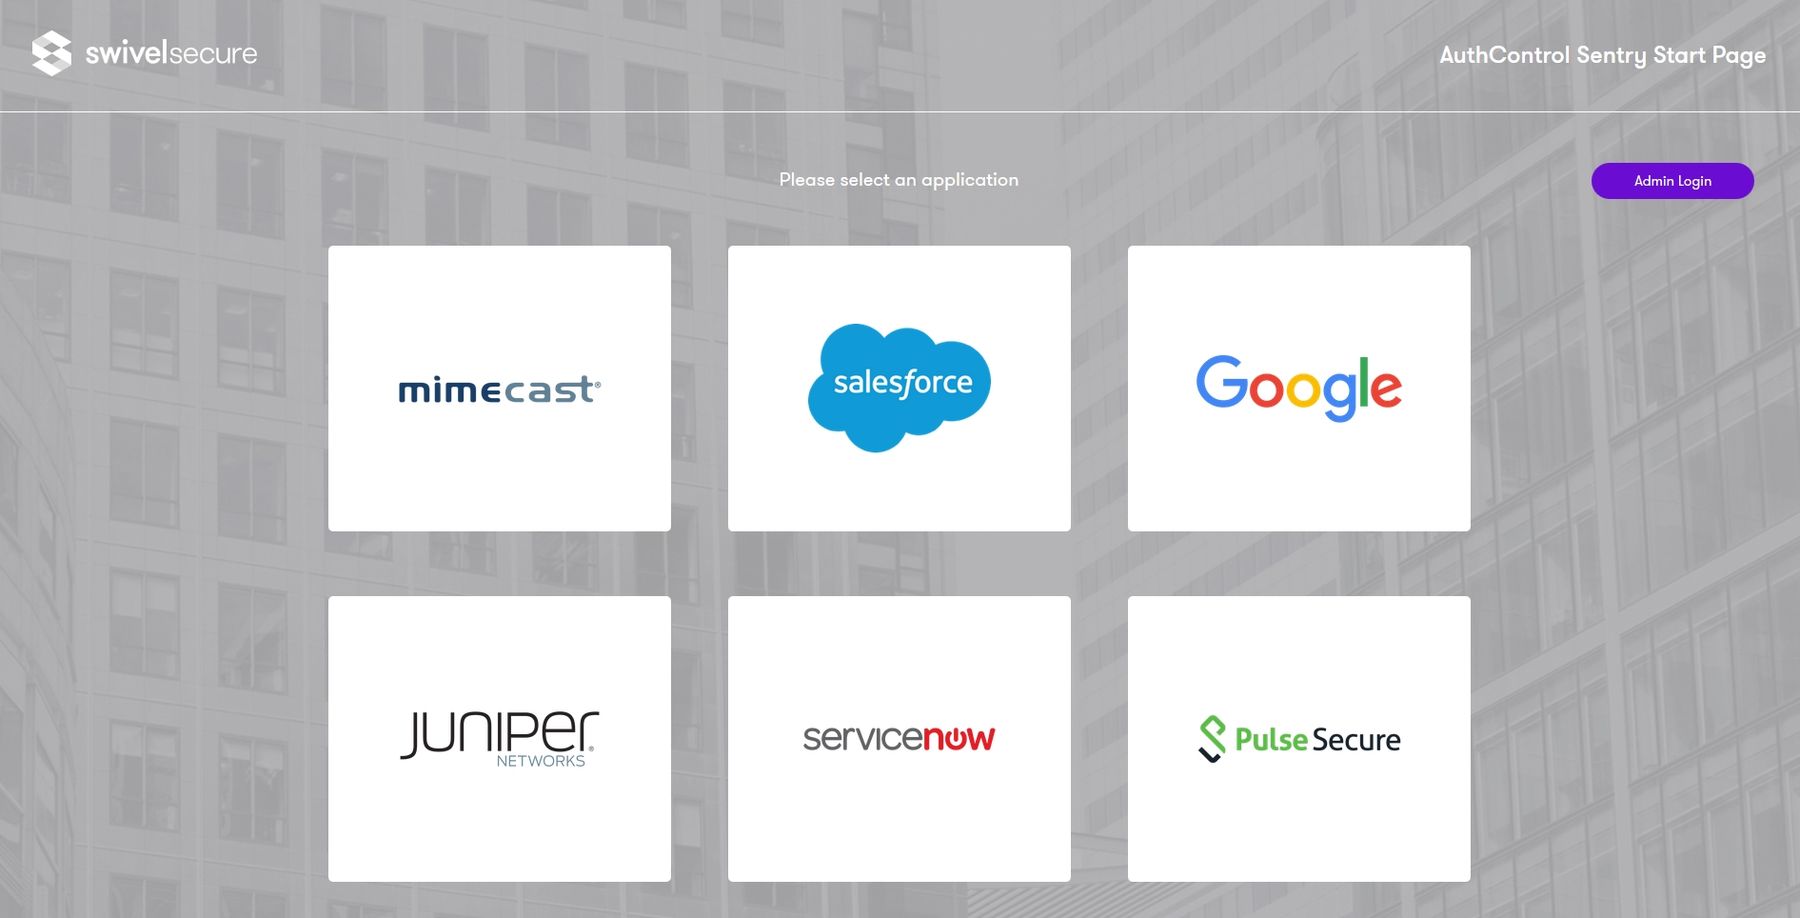
Visit your AuthControl Sentry Page with your public DNS entry of your Swivel AuthControl Sentry server, e.g.
https://mycompanysentrydomain/sentry/startPage
On a Start Page you will be able to see a new PulseSecure Icon on which you can click and proceed with authentication (as you would by going straight to the PulseSecure page)
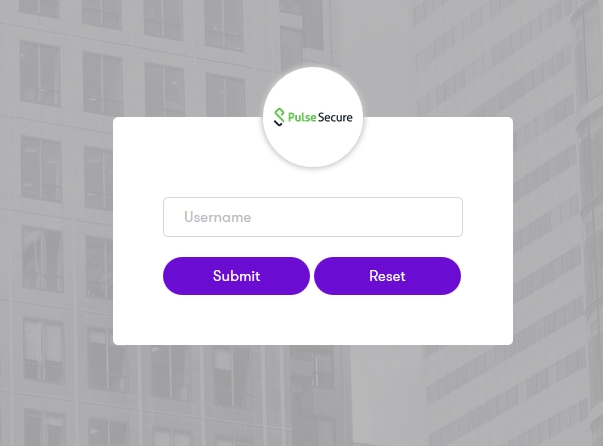
When you visit this URL you will notice that the domain should redirect to the identity provider login URL that you setup, once you have submitted your username. You should be presented with the page of the Authentication Method which can score enough points to match the points required by the PulseSecure Application definition.
In this login example we are using the email as a username:
After we enter the username we are prompted with another authentication method (in this example we use Turing image):
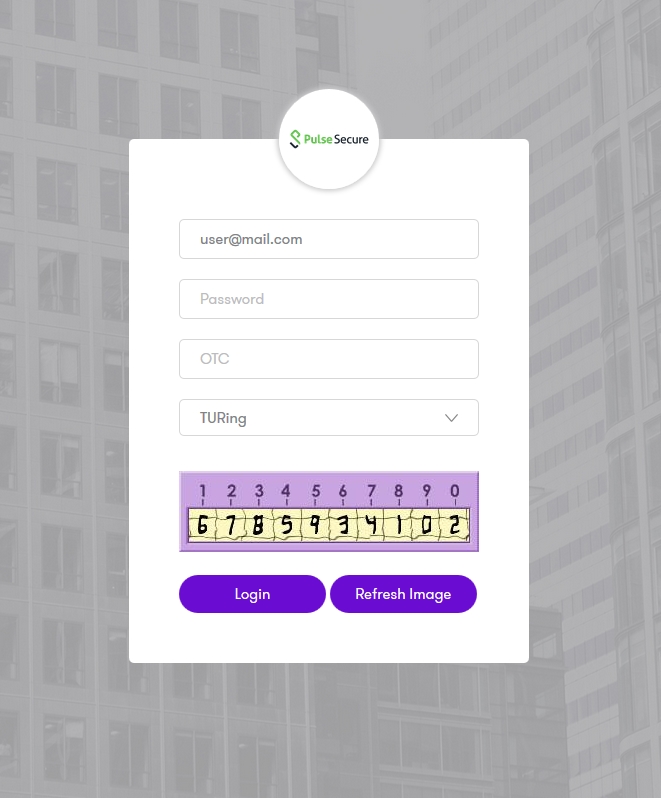
After we enter our authentication credentials we successfully will see the PulseSecure that we tried to access.